Tag Archives: cook

Comfort Foods for the Holiday Season

It’s the most wonderful time of the year, and it’s my favorite time of the year too! One of the aspects of the holiday season I love the most is simply having wholesome meals with my friends and family. For me, every meal with people I love during the holiday season is a celebration. I cook something warming and comforting, I turn on the Christmas lights, I play the Christmas tunes, and we have ourselves a merry time. So I wanted to share with you some of the comforting dishes I like to make around this time of year. Explore below!

Easy Bolognese

Bolognese 9


As an Italian-American, I find few dishes more comforting than pasta with a chunky red sauce. Bolognese is a classic sauce you can use for pasta, gnocchi, polenta, spaghetti squash, or by itself with crusty bread. My recipe for Bolognese is simple and warms from the soul outward.

Stuffed Acorn Squash

stuffed-acorn-squash-022

This is the one to make when you are looking to impress your guests. Sweet, savory, and spicy, Stuffed Acorn Squash is an indulgent, gourmet-style dish that has everything going for it. Get the recipe here.

Butternut, Brussels, and Bacon Pizza

Butternut Brussels Bacon Pizza 1

I love making seasonal artisan pizzas. For Fall and Winter, my go-to pizza is this Butternut, Brussels, and Bacon Pizza. Truly, this is one of the best pizzas ever. This is great for a weekend night in with friends while watching a Christmas movie. Get the dough here. 

Honey Roasted Carrot and Parsnip Soup

carrot-parsnip-soup-17

This soup is a great easy weeknight meal served with salad and bread or can be used as an appetizer course. Both sweet and savory, this soup feels very seasonal and like something you would have in a Christmasy cottage somewhere in a fairy-tale. Learn to make it here. 

Johnny’s Tomato Soup

Tomato Soup 7.jpg

Sometimes, tomato soup just cannot be beat. While tomato soup isn’t the fanciest of dishes, it is often a great choice on a busy weeknight or when your guests are wanting to still eat healthy while also eating cozy. My Tomato Soup is warming, earthy, and slightly spicy and is completely vegan. I will serve this with a nice winter salad and some crusty bread and before you know it you have a full holiday meal. Get the recipe here. 

Christmas Biscotti

Christmas Biscotti 14.JPG

I am not much of a baker, but once a year I get in the kitchen and whip up a batch of my Christmas Biscotti. These biscotti have the flavors and colors of the season with cranberries, pistachios, orange zest, vanilla, Amaretto, and dark chocolate. These are an incredibly festive dessert and are also a great baked good to bring to potlucks or even present as a food based gift. Learn to make them here. 

Whatever you decide to cook for your loved ones this year, I hope that you have a very merry and tasty holiday season!

A Paella Experience

As many of you may have seen if you follow me on social media, I was recently on holiday in Spain. I embarked on this Spanish adventure to see the beautiful and iconic sites, engage with the vibrant people and culture, and of course, I went to eat and drink A LOT. I enjoyed a truly unfathomable amount of sangria and indulged in Spain’s national dish, paella. Now, I will not recount every single meal I ate nor review every single restaurant that I dined in; if I did that, I would be on my way to publishing a travel guide. I will, however, share a wonderful experience I had; my Paella Cooking Class through Airbnb Experience.

159

I highly recommend Barcelona.

If you live under a rock and are unfamiliar with Airbnb, read about it here. For the rest of you who know Airbnb already, you might be surprised and delighted to learn that Airbnb now offers “Experiences” in which locals host an event, tour, or class of some kind that gives participants a taste of their city and community. Airbnb users visiting that city or community sign up and attend to join in the “experience” offered; it could be a hike through scenic hills followed by a picnic, a pub crawl, an art tour, or really anything that a host feels would be a good way to experience their homeland. The concept is unique and fantastic, offering travelers a chance to not only learn something new and/or do something fun under the guide of a local, but also the chance to meet up with other travelers! I think you should check it out.

Anyway, while I was in Barcelona, I noticed that Airbnb Experience was advertising a Paella Cooking Class. Upon further inspection, I learned that for just $30 I could attend this cooking class, instructed by a local cook, hosted in a professional kitchen, and learn to make sangria, paella, and a Catalan cream dessert, which I would then get to eat and enjoy. Sign me up and take my money! I was in.

The class was led by Eladi, a Catalonia-Spain native with a passion for cooking and drive to share traditional Spanish and Catalan cooking techniques with others. He believes in cooking with quality ingredients and infusing the food you cook with love and good energy; my kind of guy!

Paella 17

The class took place in the kitchen of a bakery which we were allowed to use for our cooking purposes. With it being a professional kitchen, we had plenty of space for our class (and bonus, the bakery happened to be a 1 minute walk from my Airbnb!) And so, under Eladi’s instruction, our group of nine Airbnb travelers gathered around a big center island in the kitchen and set out to learn!

Eladi taught us first to make the traditional, and dearly beloved, Spanish drink that we all know and love, Sangria. He gave us a little background on its origins and then divvied out tasks for a few of us to do: squeezing oranges, cutting apples, etc. I myself had never made Sangria and so I really enjoyed learning the basic measurements and techniques for making it because I would like to make and drink more Sangria on a normal basis (you know, for health reasons). Anyway, we mixed everything in a big pitcher and stored it away in the fridge to emulsify for the next couple of hours, with the promise of our being able to drink the sangria when it and dinner was ready!

See Eladi’s original recipe for traditional Sangria here: Sangria Recipe

Below, I have rewritten the recipe to be in the British-American recipe format and using American measurements.

Sangria

  • Servings: 6
  • Difficulty: easy
  • Print

Ingredients:

  • 4 cups red wine
  • 1 large apple, large cubed
  • 1 large orange, sliced
  • 1 large orange, juiced
  • 1 large lemon, sliced
  • 1 large lemon juiced
  • 2 sticks cinnamon
  • ¼ cup sugar
  • 2 cups soda water
  • Ice

Directions:

Pour the wine in a pitcher. Add the juices of the orange and lemon. Add the cubes of apple, slices of orange and lemon, and the cinnamon sticks. Add the sugar and stir. Allow to chill for minimum 2 hours to maximum 24 hours. To serve, add ice and soda water, serve, and pour.

Pro-Tip: Sangria really should be made with Spanish wine and if you are in the States, Trader Joe’s has this good, inexpensive choice! See below!

Spanish Paella

Paella 12

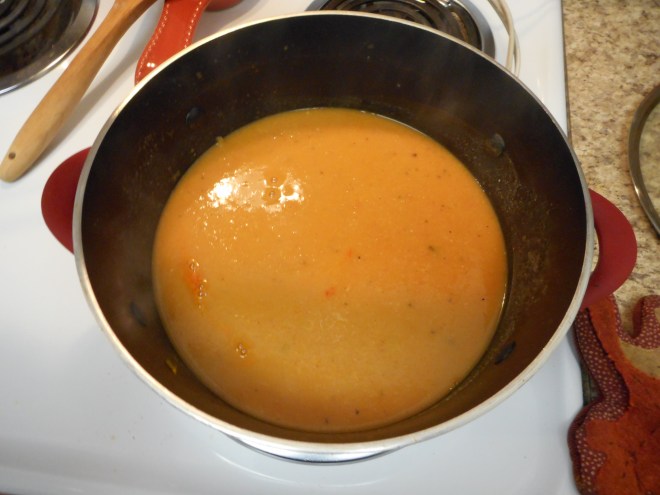
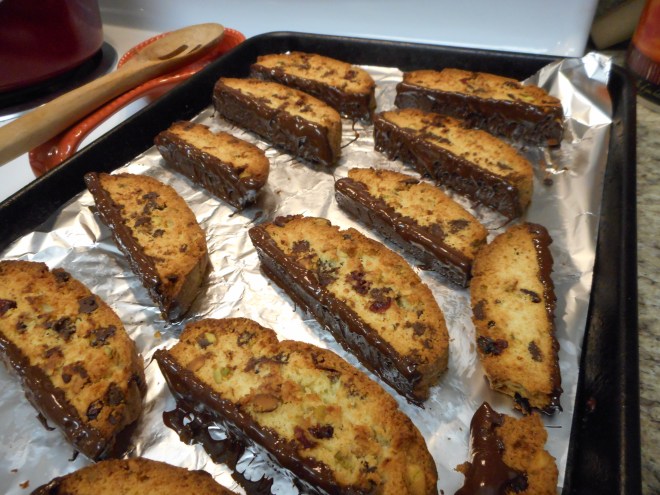
Next, we moved onto making the Catalan Cream for dessert, a very popular and traditional dessert in Spain’s region of Catalonia. It is essentially a custard made from milk, sugar, egg yolks, cinnamon, and lemon which is chilled in individual dishes, topped with sugar, then torched to create a sugar-glass crust. Think of a cross between flan and crème Brule, flavored with lemon and cinnamon; that’s Catalan Cream. Similarly, Eladi asked for volunteers to execute tasks like beating egg yolks and sugar together and so on. I am not a huge dessert eater or creator, so I really enjoyed adding this dish to my repertoire!

See the original recipe here: Catalan Cream Recipe

Again, below I have rewritten the recipe to be in the British-American recipe format with American measurements.

Catalan Cream

  • Servings: 6
  • Difficulty: intermediate
  • Print

Ingredients:

  • 4 cups milk
  • 2 cinnamon sticks
  • Peel of 1 whole lemon
  • 1 ½ tablespoons corn starch
  • 8 egg yolks
  • 1 cup sugar

Directions:

Place 3 cups of the milk, the cinnamon sticks, and the lemon peel in a small sauce pan and bring to a boil over medium heat. Once boil is reached, turn off the heat and allow flavors to infuse for 10-15 minutes. Discard the cinnamon sticks and lemon peel after this time.

Meanwhile, in a large bowl, beat the remaining 1 cup of milk, egg yolks, sugar, and starch until well mixed.

Add the egg mix to the sauce pan with the milk. Bring back to a boil over medium heat, continuing to whisk until the mixture starts to thicken, about 8 minutes. Turn off the heat and whisk 1 more minute.

Pour the mix into individual clay pots or ramekins and chill for 2-24 hours. When ready to serve, top each surface with an even layer of sugar, about a tablespoon, and using a blow torch, burn the sugar until a crust is formed. Serve and enjoy!

Paella 2

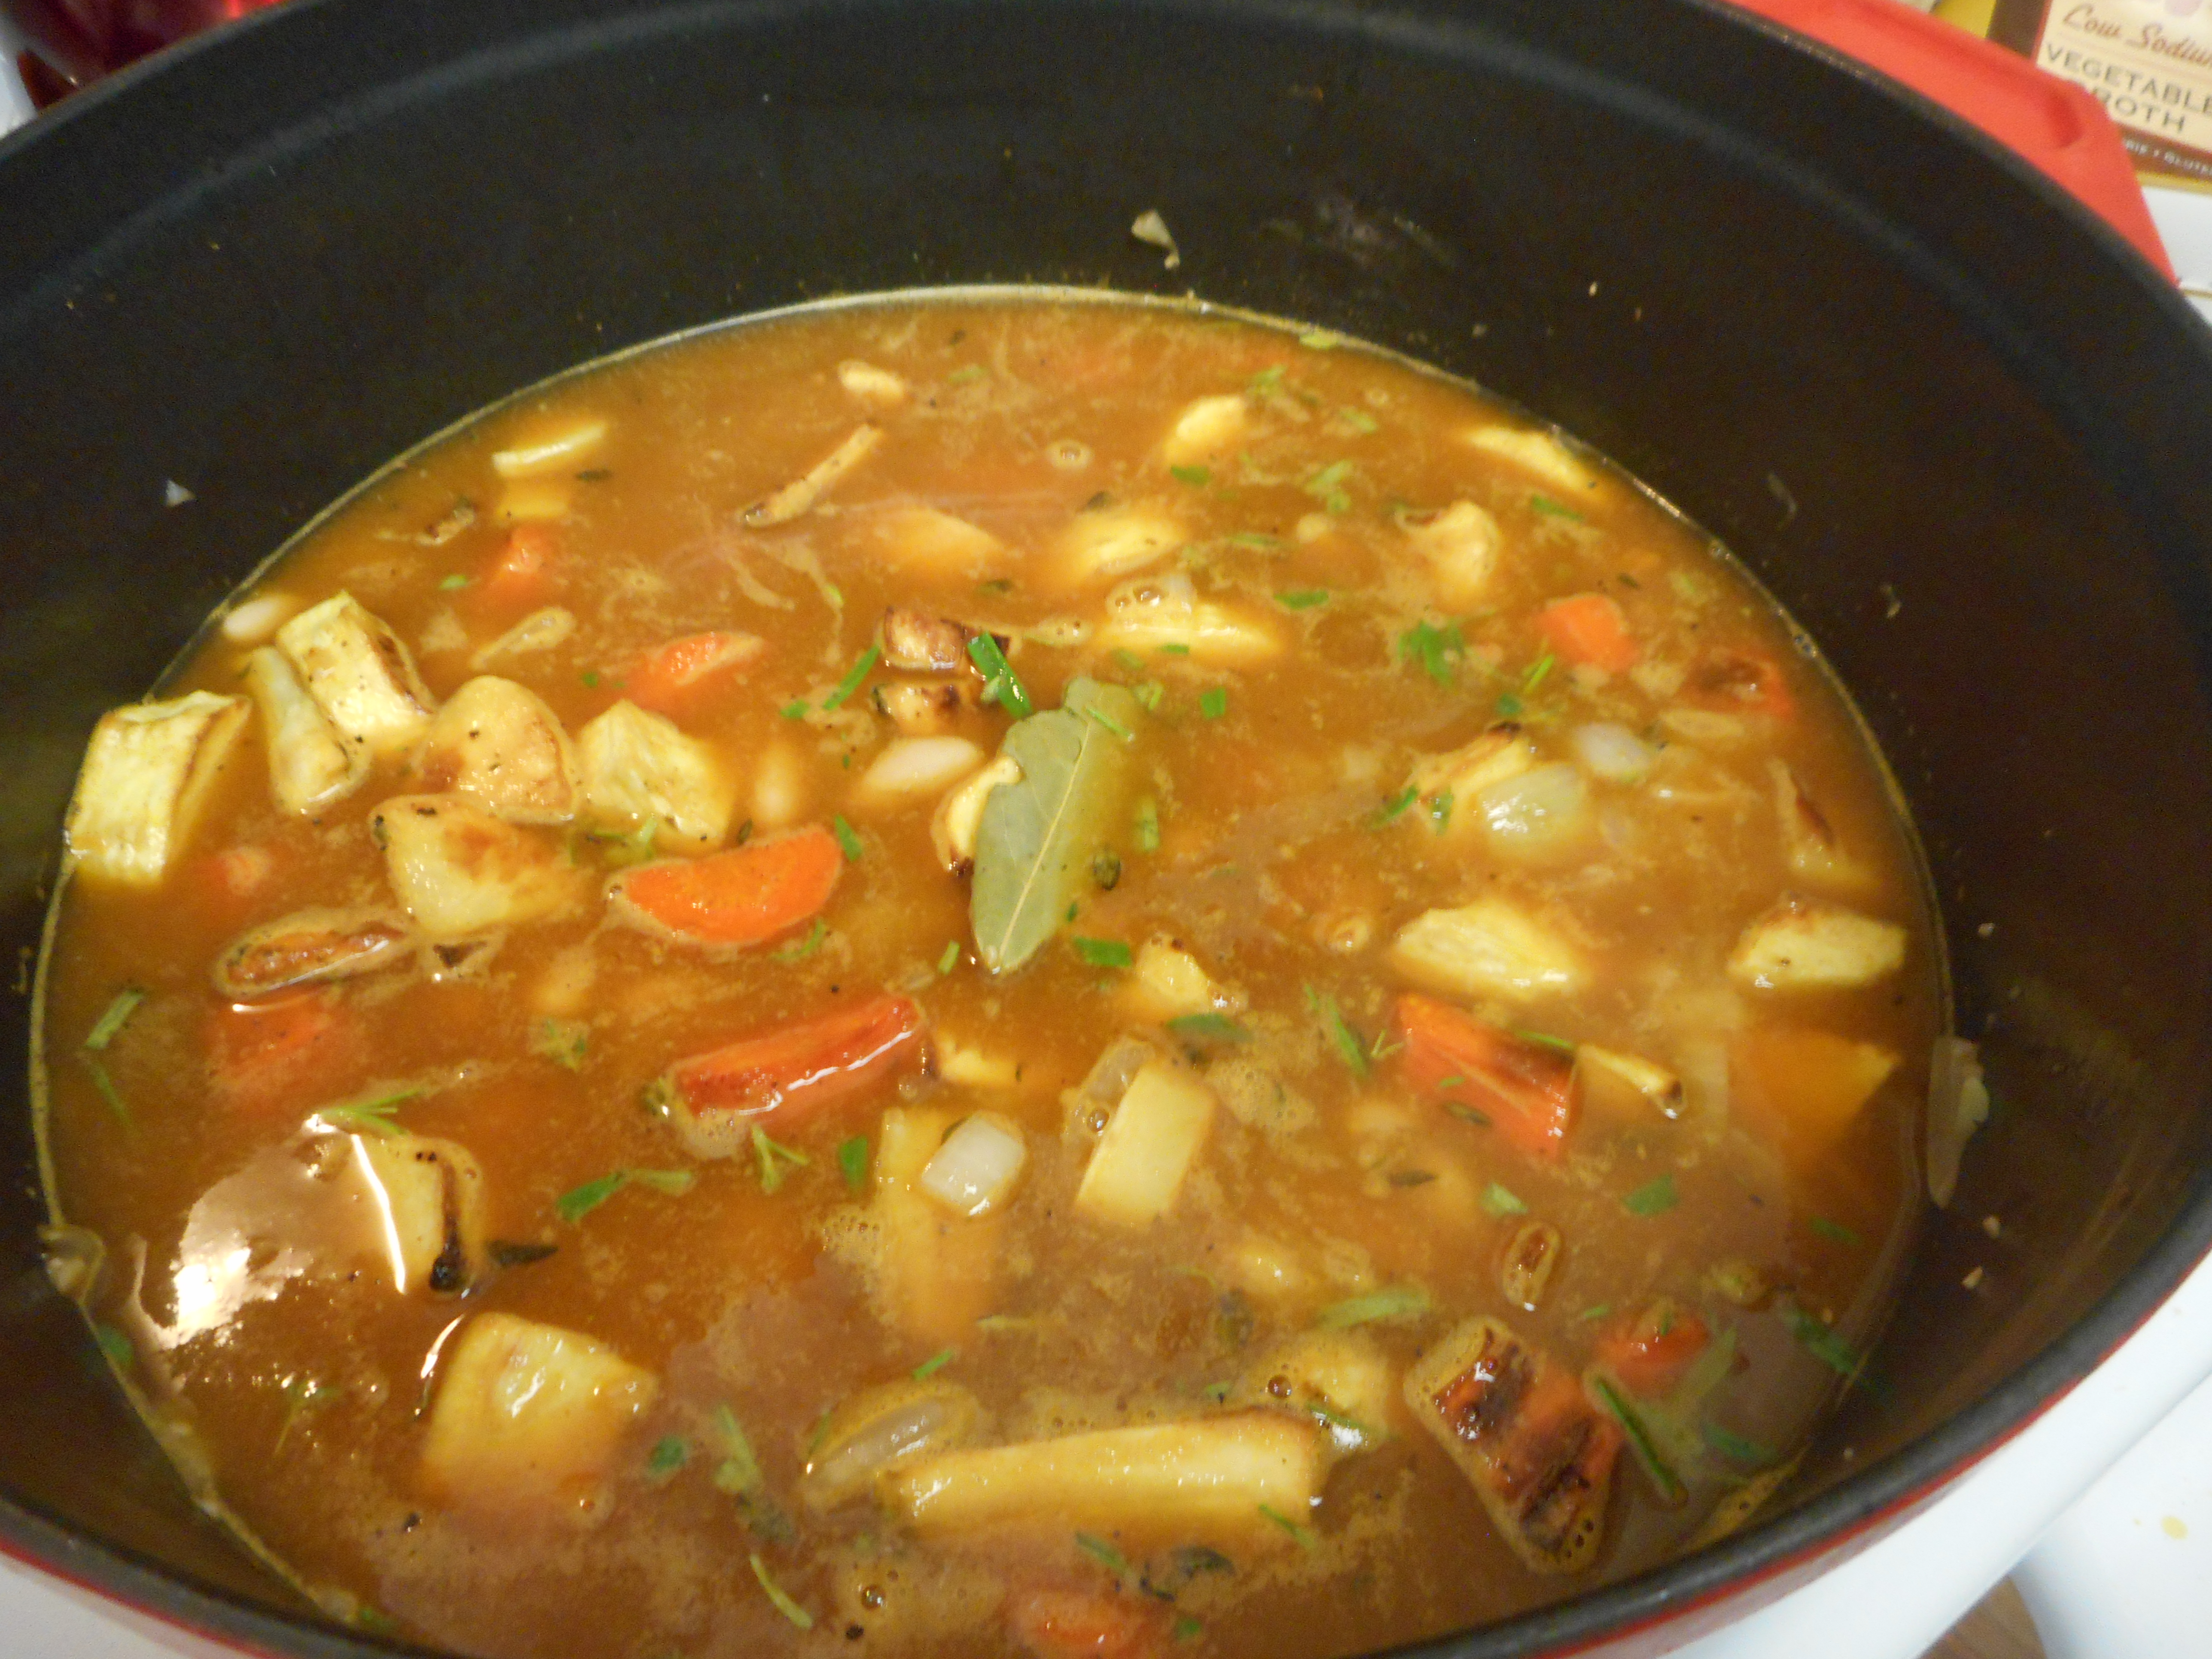
Finally, we embarked on cooking the main course, the highlight; traditional Spanish Paella! Here again, even with how big of a cook I am, I had never tried to cook paella, though I’d always wanted to. In this setting with Eladi as my guide, I was able to not only learn the techniques and basic measurements for paella, but also the culture around it. Here were some of the takeaways pertaining to paella:

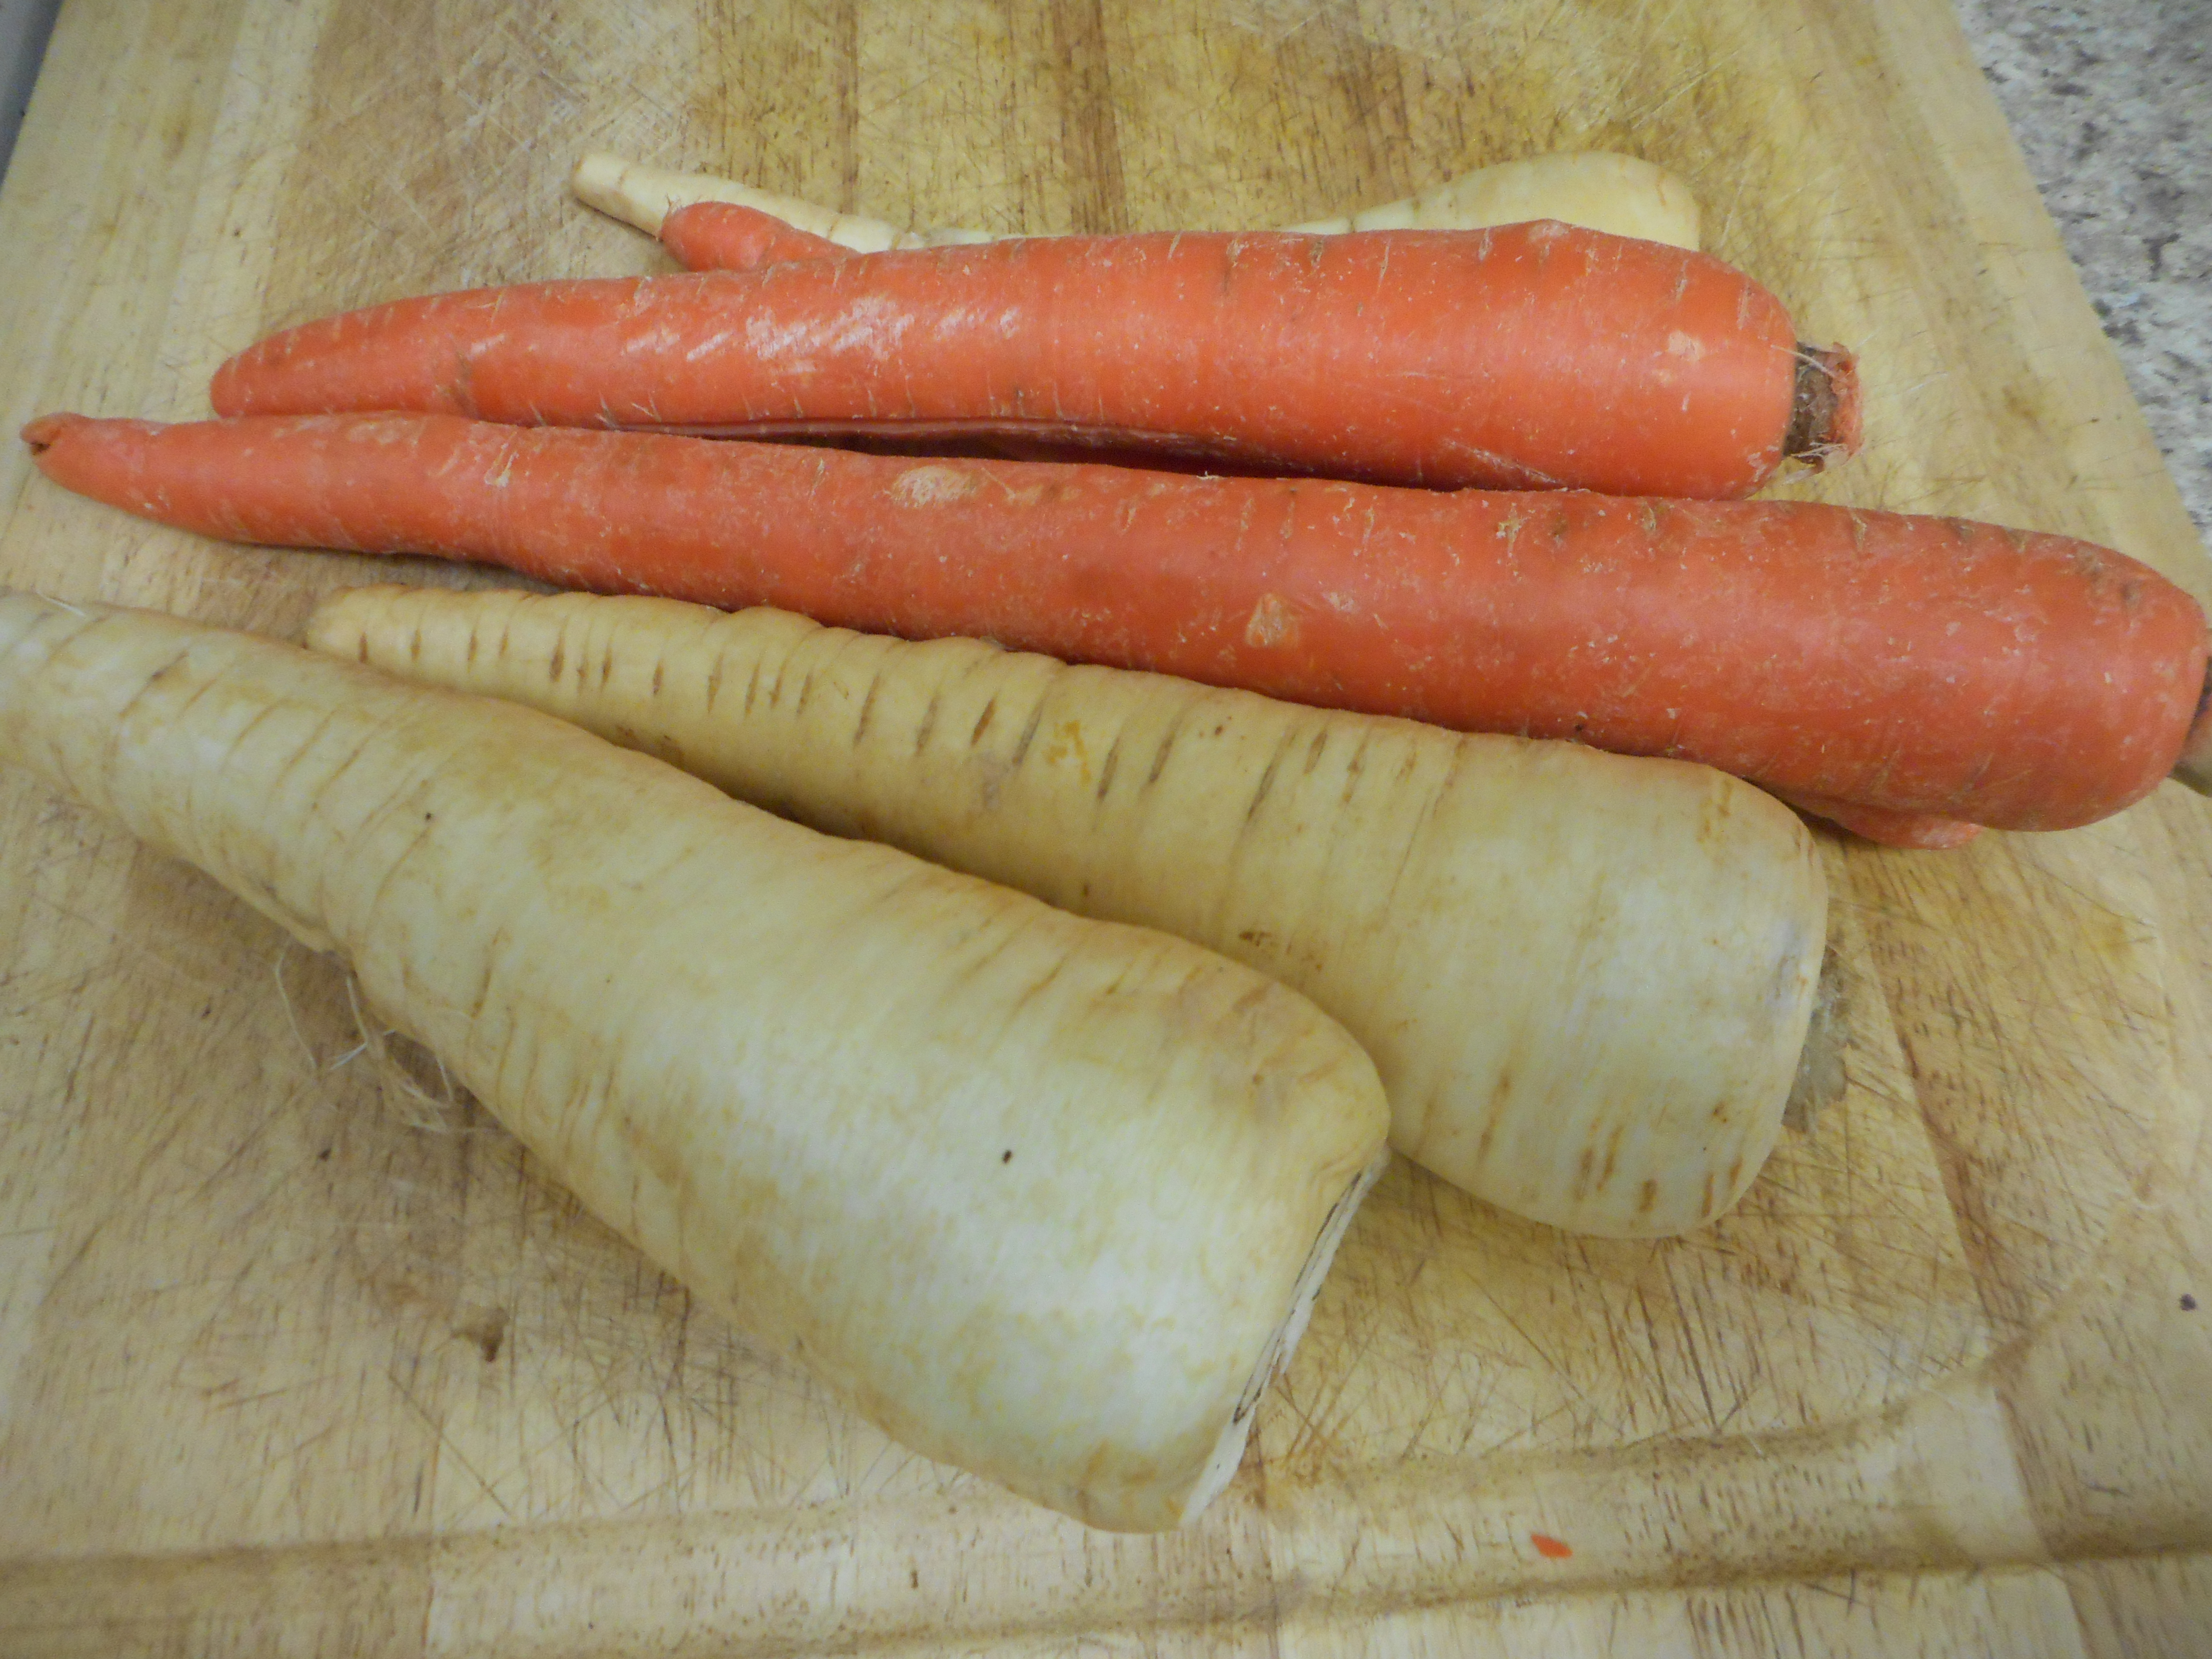
  1. Paella is not always made with shellfish or seafood – Contrary to what you see online or television, Spanish families use whatever protein is available for when they would like a pan of paella, and that does not always involve expensive seafood. Similarly, paella can be made with different types of vegetables depending on the season, and paella can be completely vegetable based as well if you would prefer not to have animal protein. We had a chicken-only paella.
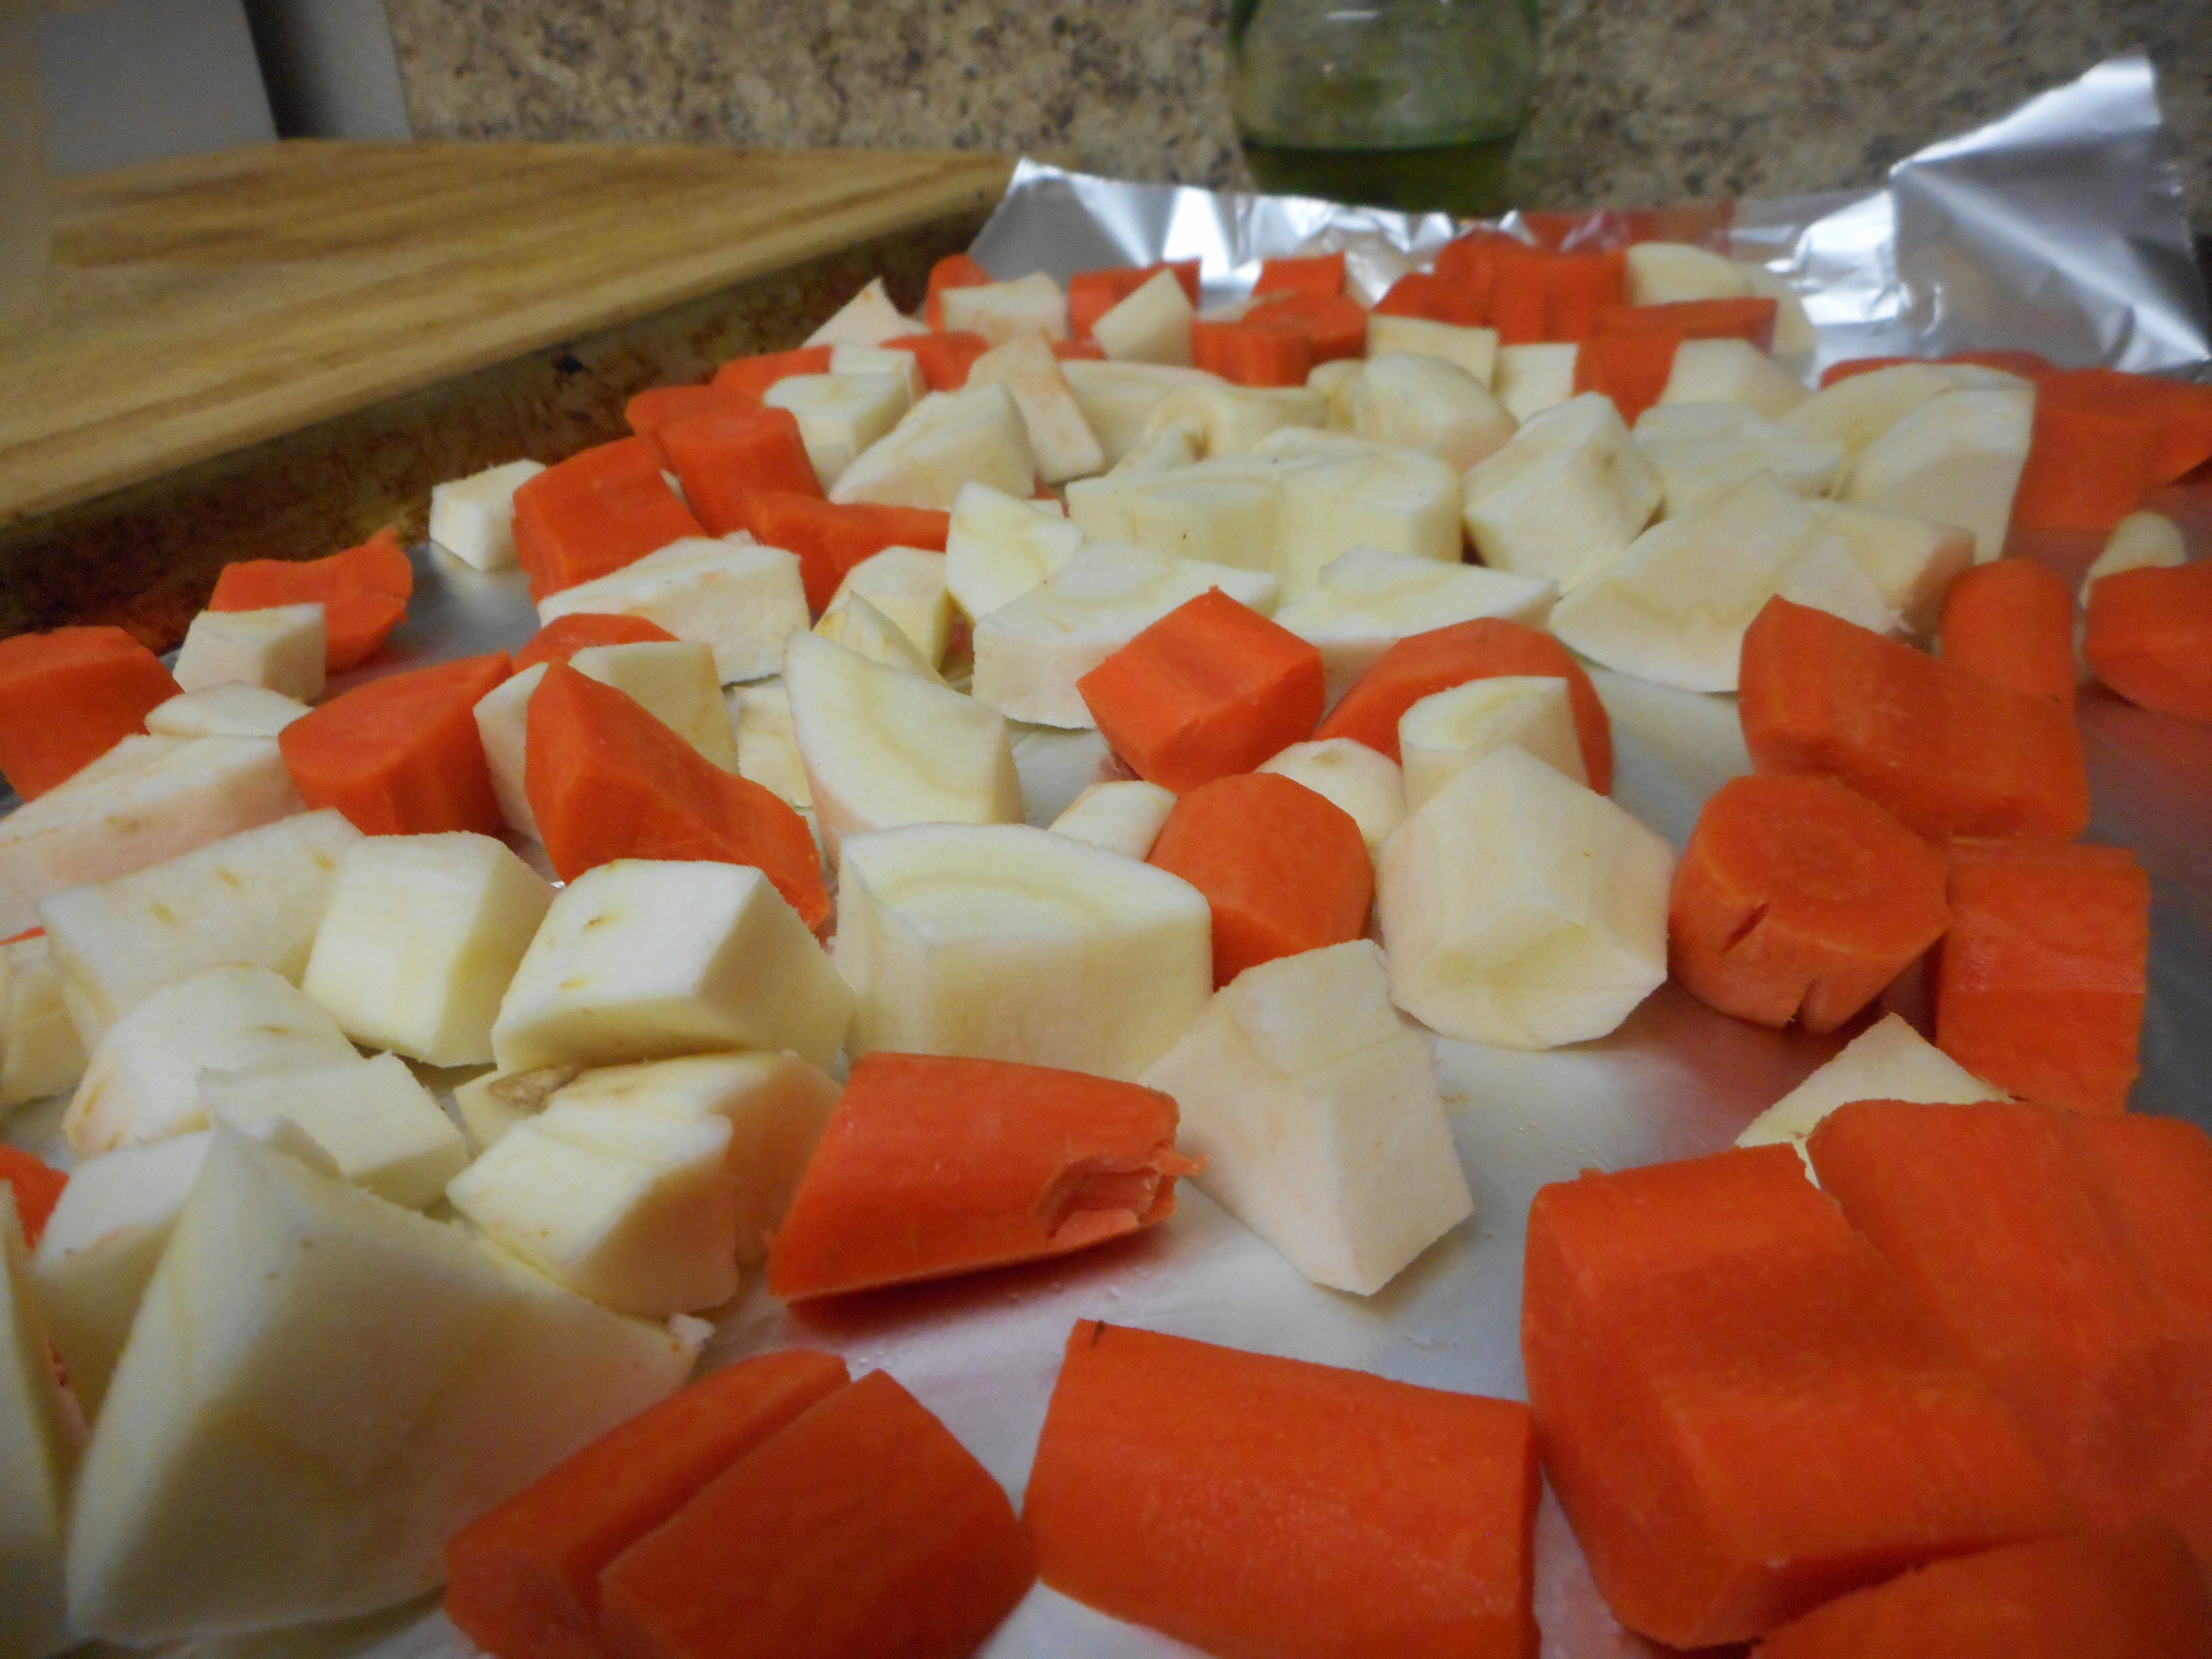
  2. Paella is a dish that is built in stages from the center out – Oil is heated at the center of the pan. Salt and garlic are added to the oil to season said oil which will in turn season and flavor the rest of the dish. Proteins are added and cooked at the center, then they are pushed out in a circle and vegetables are added to the center. This process continues until all the larger ingredients are cooked, after which the rice is added and cooked for a short time before it is drowned in broth and the remaining herbs and spices are added, at which point the paella is pretty much left alone until the rice absorbs the liquids.
  3. Paella is a communal dish – This was the most important takeaway I found. Paella is not traditionally something that the main cook in the family makes in private then serves to everyone else in the family when it is ready. Rather, the act of cooking paella is a group effort. Spanish families make an afternoon of paella, gathering in the kitchen, each person fulfilling a role in the cooking process. Much like in our cooking class, steps are divided out; someone cuts vegetables, someone grates tomatoes, someone prepares the herbs, someone mans the pan, etc. Everyone is involved in the preparation of this traditional dish and when it is finished cooking, everyone enjoys it all together, usually out of the same pan!
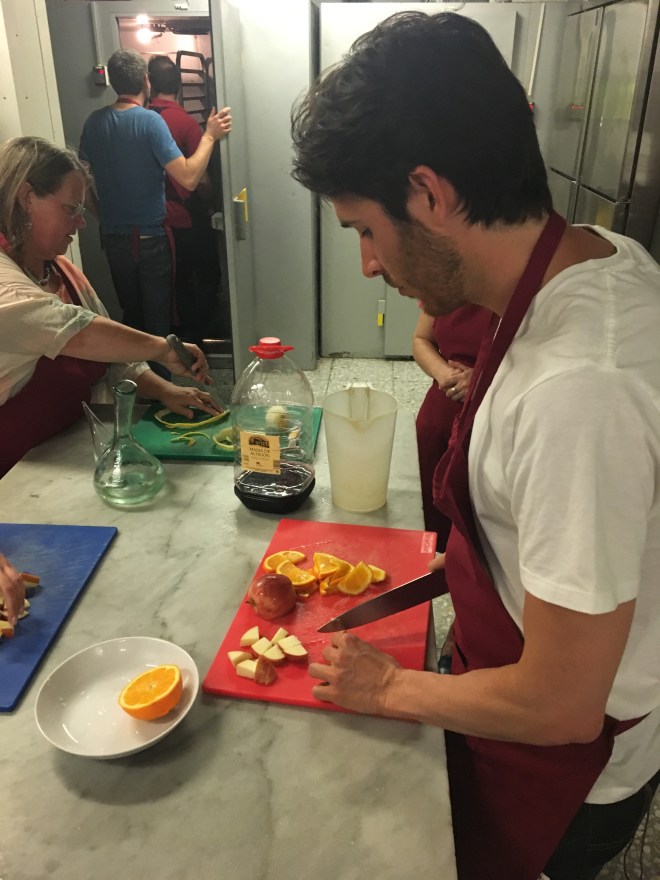
 

We each did our part in the cooking as we learned, we chatted and laughed, and after about an hour of all of this, the paella was finally ready. We poured ourselves glasses of our previously concocted sangria which was incredibly, beautifully smooth, and we were then ready to eat.

Eladi placed the giant paella pan in the middle of the kitchen island and handed out big wooden spoons that paella is commonly enjoyed with in Spanish households. Then, as is traditional, he drew lines in the paella to create pizza slice-like sections. We all chose our own section and dove in. Truly, that first bite of our communally cooked paella was divine. The flavor salty, slightly smoky, and very savory, the texture delightful to the tongue, the chicken juicy and rich. I had had paella a couple of other times while in Spain at this point, but this homemade paella definitely won out as the best paella I had on my entire Spanish adventure.

Paella Selfie.jpg

Furthermore, our group indulgence in this dish that we had all played a part in creating, our sharing in the dish all out of the same pan, made our eating more than just eating; it made it a special and memorable experience, as well as a delicious one.

See the recipe for Eladi’s Paella here: Paella Recipe

Once again, I have rewritten this recipe in a British-American recipe format with American measurements.

(You can take this recipe and get creative with your meats and veggies, as long as you have the basic measurements and techniques down.)

Paella

  • Servings: 4-6
  • Difficulty: intermediate
  • Print

Ingredients:

  • ¼ cup olive oil
  • Big pinch of salt
  • 4-6 garlic cloves
  • 1 ½ pounds chicken (whatever pieces you like, cut up)
  • 1 – 1 1/2 cups green beans, cut in half
  • 2 large tomatoes, grated
  • 2 tablespoons smoked paprika
  • Rice
  • 12 strands saffron, soaked in 3 tablespoons of warm water
  • 2 bunches rosemary
  • 2 ½ cups Bomba Rice
  • 6 cups chicken stock, warmed

Directions:

With the paella pan over low heat add the salt over the whole surface. Pour in the oil and allow to heat a minute. Add the garlic to the center of the pan and cook 1 minute. Add the chicken to the center and cook until browned, turning occasionally, about 5 minutes. Move the chicken away from the center. Add the green beans to the center and cook 2 minutes. Move the green beans away from the center. Add the grated tomato to the center and stir 1 minute. Add the paprika and mix everything in the pan together.

Add the rice all over the surface and stir with all the other ingredients for 1 minute. Add the hot chicken broth. Move the meat and vegetables to be arranged evenly throughout the pan. Distribute the saffron threads evenly throughout the broth. Add the rosemary bunches.

Raise the heat to medium-high until the broth boils. Then lower to the lowest possible heat while still continuing the boil, usually a medium-low. Watch the paella and when rice grains appear on the surface of the liquid, lower the heat to low. Cook until the rice is firm, but tender, about 10 minutes. Turn off the heat, cover with lid, and let stand 5 minutes.

Serve right out of the pan with wooden spoons!

Notes:

It is important to choose a quality paella pan and make sure that the pan can be placed somewhere where heat can be distributed evenly.

Needless to say, I greatly enjoyed our Paella Cooking Class through Airbnb Experience. It offered a chance for my friend Kayleigh and I to make new friends in our fellow travelers and also in Eladi. It allowed us to learn new dishes we had always been interested in cooking. And of course, it gave us a space to have fun and to have a delicious meal. Now home from Spain, I am very much inspired to purchase a Paella pan and have a “Paella Party” with all my friends, giving us all a chance to enjoy the communal and tasteful experience that the Spanish have created around Paella.

If you are traveling to Barcelona and are interested in taking this class with Eladi, please visit the following to see when and how you can join!

http://paella.experientz.com/

https://www.airbnb.es/experiences/51311

https://www.tripadvisor.com/Attraction_Review-g187497-d12246113-Reviews-Paella_Experientz_Barcelona-Barcelona_Catalonia.html

Spaghetti alla Carbonara

It’s been a minute since Johnny La Pasta shared a pasta recipe with you. And so, today I am sharing one of my all-time favorite recipes that I learned in the motherland (Italy): Spaghetti alla Carbonara.

In 2014, I embarked on the adventure of a lifetime, traveling all around the Italian peninsula with a whole party of new and now very dear friends. We visited the historical and iconographic sites, we took in the naturally dramatic and beautiful landscapes, we immersed ourselves in the warm and vibrant culture, and we DRANK A LOT OF WINE and we ATE A LOT OF PASTA.  It was bliss.

Eating pasta in Italy is true living. Beyond the soul joy of devouring bowls of authentic pasta dishes, for a cook like me, these indulgences were also inspirations for my own kitchen back home. Whilst in Rome, we had a lot of Pasta alla Carbonara as this is Rome’s signature dish. My Italian family did not immigrate to America from Rome, they came from Calabria in the south, and so no authentic recipe for carbonara came over with them. Pasta alla Carbonara was not a dish I normally had growing up, so having the opportunity to taste authentic incarnations of it in Rome was new and exciting for me.

Of course, I had had Pasta alla Carbonara dishes here in the states; but they were always incredibly cream based, white and gooey, made with a rue like an Alfredo sauce. I could never really detect the use of egg and therefore could not appreciate it in these dishes, which is unfortunate as egg is supposed to be a main feature of any carbonara.

So I was pleasantly surprised by the Roman’s carbonara dishes: silky, smooth, salty, decadent, very simple, yet absurdly divine. The use of egg is pronounced in these dishes as the yolks provide a beautiful yellow gold color for the sauce and create a silken consistency, making the dish creamy and luxurious but in a different way than probably most American eaters are used to. I was hooked on the stuff, and I had to know how to make it at home.

I spoke with several natively Italian cooks about carbonara at length because I am me and obsessed with food. I explained to them what most Americans thought carbonara was: a cream sauce made from flour, butter, and milk or cream cooked down with cheese melted into it and then an egg beaten in for good measure, often served with peas and mushrooms. The Italians were absolutely, deeply, and profoundly horrified to hear this. They told me that, “If that is how Americans are making carbonara, they should be ashamed of themselves.”

They then proceeded to BLESS me with the proper, authentic technique for Pasta alla Carbonara in the hopes that I could bring it back home to the USA and bring the American people closer to God by showing them how to make and eat carbonara right!

The secret to this carbonara is that it is super simple: eggs, parmesan and pecorino cheese, pancetta or bacon, black pepper, and pasta. That is all. No fancy rue sauce, no added cream, no mushrooms, no peas.

Basically, the eggs and cheeses are beaten together in the bottom of a pasta bowl to make a thick cream. Once the pasta is done cooking, it is removed from the water, and the bowl with the egg-cream is placed on the pot with the hot pasta water still in it. The heat from the water underneath the bowl starts to cook the egg-cream mixture. The pasta is added, with more cheese, and the heat from the pasta 1. finishes cooking the egg-cream sauce so that it is safe to eat and 2. melts the cheese and eggs into a thick, silky sauce the coats the noodles completely. Bacon or pancetta is added and the dish is served. That is all and it’s truly one of the greatest pasta dishes ever. I typically make this dish with Spaghetti as the long noodles are perfect to be coated and twirled in this rich sauce.

Spaghetti alla Carbonara has since become a staple dish in my kitchen. I turn to it again and again for its ease and affordability, its authenticity and its decadence, and for its ability to transport me right back to the streets of Rome with each and every bite. I hope you enjoy Spaghetti alla Carbonara! Buon Appetito!

Spaghetti alla Carbonara

  • Servings: 4
  • Difficulty: easy
  • Print

Ingredients:

  • ¾ lb-1 lb spaghetti
  • 4 egg yolks
  • 1 full egg
  • ½ cup grated pecorino romano cheese
  • ½ cup grated parmesan cheese
  • 5 slices bacon or wheels pancetta
  • 2 teaspoons cracked black pepper

Directions:

Cook bacon your favorite way. You can chop the bacon up into bits, cook until browned and crispy in a pan, and set aside to drain on a plate lined with paper towels. Or, you could cook bacon my way! Place a cooling rack on a baking sheet, lay the bacon pieces across the rack, and bake in the oven at 400F till crispy, about 20 minutes. Remove, allow to cool, and cut into pieces.

Bring a large pot of salted water to a boil. Add the spaghetti and cook till al dente, about 8-9 minutes.

Meanwhile, place the eggs, black pepper, and ¾ of the pecorino and parmesan cheeses in a large glass bowl. Whip until completely combined; it should be very thick.

Without draining the pasta water, remove the spaghetti to a separate bowl. Turn off the heat. Place the bowl with the egg-cream mixture atop the pot of hot water. Whip the mixture quickly for 30 seconds. Add the pasta to the bowl and remaining cheese to the bowl. Work quickly and toss for 1 ½ minutes until the sauce completely coats the noodles.

Serve equal amounts into bowls and top with the bacon/pancetta. Garnish with additional cheese and if you’d like, a small chopping of parsley. Serve and enjoy!

Spring is Sprung

The Spring Equinox is upon us and the season of spring is coming into full bloom! Each season has it’s own beauty and importance. Spring’s beauty is in its power as a time of renewal, of freshness and growth, of more sunlight and warmth, and of enhanced energy. There is much to be enjoyed in this new, bright season. And as with any season, spring brings different flavors and focuses. Here are a few of my favorite articles that are rooted in this great season to help you have the best spring possible!

(1) Pasta Primavera 

pasta-primavera-016

Pasta Primavera translates in Italian to “Spring Pasta” as this dish features on the fresh and bright flavors of the season.

(2) Shepherd’s Pie

Shepherds Pie

Saint Patrick’s Day is technically in winter, but we still consider it a Spring Holiday. And on this holiday, it is time for a Celtic Classic: Shepherd’s Pie.

(3) Slow Cooker Lemon Artichoke Chicken

Lemon Artichoke Chicken 2

Spring is a time for brighter flavors and of course, artichokes! This Slow Cooker dish can be dumped in the pot within 2 minutes and you come ready to a zesty and fresh meal!

(4) Saucha and the Spring

cleansing rain

Spring is a time of cleansing and growing. Explore this with yogic concept of “Saucha.”

Honey Roasted Carrot and Parsnip Soup

One of the best parts of travel is indulging in the foods of the lands in which you are visiting. You enjoy the distinctive flavors and cooking styles, and maybe even receive a little culinary inspiration to take home with you! When I was in Scotland this past October, my mum and I stopped in at a little place that had been recommended to us by several locals: Clarinda’s Tea Room. Clarinda’s Tea Room is a truly quaint establishment with soft tea-time-like décor, serving up affordable, comforting, tasty breakfasts and lunches along with a bounty of cakes, scones, biscuits, and of course, tea.

We enjoyed lunch at Clarinda’s, opting for the half sandwich and soup special. That day, the soup du jour was a Honey Roasted Parsnip Soup, and it was delightful. Being Scotland in the autumn, the weather is quite gray, cool, and rainy, and so many seasonal dishes feature hearty root vegetables that are warming and comforting; this soup was exactly that.

Clarinda’s Tea Room – Honey Roasted Parsnip Soup

parsnip-soup-clarindas-tea-room

Whilst eating the soup, I received the inspiration and came up with the concept for my own root vegetable soup. Just over a week after returning to America from the United Kingdom, I put that culinary inspiration to the test and this was the very tasty result!

My version! Honey Roasted Carrot and Parsnip Soup

carrot-parsnip-soup-20

This Honey Roasted Carrot and Parsnip Soup is both sweet and savory, soulfully warming and superbly comforting. It reminds me of that Parsnip Soup I had at Clarinda’s, and is in many ways a colorful cousin to that soup. Sweetly roasted carrots and parsnips, savory sautéed onions, pungent garlic, and woodsy thyme and rosemary give this soup great depth of flavors that contrast and complement one another. The addition of cannellini beans makes this soup even heartier with a boost of protein, but also helps the soup to become creamy when pureed without the addition of any dairy products. This soup is completely vegan, requires very few ingredients, and can be put together in a pinch!

I’m really proud of how this recipe has turned out, and am even more taken with it as it was conceived in Scotland; now, anytime I make it, I will always remember my incredible journey there. And all of us can eat this soup for its great and cozy flavors that are perfect to be enjoyed all fall and winter long!


Honey Roasted Carrot & Parsnip Soup

Serves: 4-6 | Prep Time: 50 minutes | Difficulty: Easy

Ingredients:

  • 2 large or 3 medium parsnips, peeled and cut into chunks
  • 3 large or 4 medium carrots, peeled and cut into chunks
  • 1 tablespoon honey
  • 1 yellow onion, diced
  • 2 garlic cloves, minced
  • 1 sprig fresh thyme, leaves removed from stems
  • 1 sprig fresh rosemary, chopped
  • 1 15 ounce can cannellini beans, drained and rinsed
  • 5-6 cups vegetable stock
  • 1 bay leaf
  • 2 tablespoons olive oil
  • 1 teaspoon salt
  • 1 teaspoon pepper

Directions:

Preheat the oven to 400°F. Arrange the parsnips and carrots on a baking sheet. Drizzle with 1 tablespoon of the olive oil, the honey, half of the salt and pepper, and the thyme leaves. Toss until all the carrots and parsnips are coated well. Roast for 30 minutes until tender and slightly caramelized. Remove from the oven.

Over medium-high heat, heat the remaining olive oil in a large soup pot. Add the onion and season with a pinch of salt and pepper, cook until tender, about 3 minutes. Add the garlic and cook 1 minute. Add the roasted parsnips and carrots, toss all together. Add the beans, vegetable stock, rosemary, and bay leaf. Season with remaining salt and pepper. Stir. Bring to a simmer, reduce heat to medium-low, and continue to simmer, covered, for 15 minutes.

Uncover and remove the bay leaf. Puree by use of immersion hand blender or by transferring the soup to a food processor in small batches. Puree until completely smooth. Serve and enjoy!


Like this recipe? Let me know in the comments! Did you make this recipe? Tag me on Instagram @johnnylapasta!

Friend-time Activities That Aren’t Just Drinks and Dinner

I love getting together to catch up with my friends over drinks and/or dinner, it’s one of my favorite ways to see my friends and spend my free time. At the same time, however, there are only so many dinner slots in our schedules to dedicate to friend meetups. Also, drinks and dinners add up fast from a cost perspective (amiright or what?) So in an effort to inspire more friend get-togethers because it is a part of a healthy and happy lifestyle, here are some other friend-time activities that aren’t just drinks and dinner that you can enjoy with those special humans you decided you liked enough to keep around for a while!

Continue reading

Pasta Primavera

Sunday March 20th 2016 marked the bringing of another spring!

flower

YAY Spring is here!

Traditionally for the Spring Equinox, I always make my Pasta Primavera, and this past equinox was no exception. Pasta Primavera is a traditional Italian dish – Primavera means spring in Italian – and this dish is made all throughout the spring to celebrate the fresh produce that has come into season and harvest after the winter. I love making Pasta Primavera because it is simple, it is elegant, it supports seasonal eating, and it is actually quite healthy since it is loaded with lots of fresh vegetables and herbs.

food jennifer lawrence

Because a season change just means an excuse to eat more foods.

Sound good? I know you want to make it. Great! Well, you should make MY recipe for Pasta Primavera. Whereas many other recipes for this springtime dish call for boiling, steaming, or sauteing the vegetables within it, I roast them to really intensify the flavors because roasting brings out the best in vegetables. I also add goat cheese to this dish to bring a bright tang that I think is indicative of spring which gives the dish a slight richness and definite creaminess.

It is so simple and inexpensive, yet so fresh, bright, and absolutely delicious; I think you should definitely make my Pasta Primavera, and make it often! Buon Primavera!

Pasta Primavera

  • Servings: 3-4
  • Difficulty: easy
  • Print

Ingredients:

  • 2 large broccoli crowns, cut into small florets
  • 1 red bell pepper, sliced and cut into 2 inch strips
  • 1 yellow bell pepper, sliced and cut into 2 inch strips
  • 2 large carrots, sliced and cut into 2 inch sticks
  • 1 pint cherry tomatoes, halved
  • 1 tablespoon crushed or minced garlic
  • 10 medium thick asparagus spears, cut to two inches
  • 15-20 sugar snap peas
  • 1 cup basil, julienned
  • ½ pound Farfalle (bowtie) pasta or other short cut pasta
  • 1-2 tablespoons extra virgin olive oil
  • 2 tablespoons Herbs de Provence
  • ¼ cup goat cheese
  • ¼ cup grated Parmesan Cheese
  • ½ teaspoon salt
  • 1/2 teaspoon pepper

Directions:

Preheat the oven to 400̊F.

Arrange the broccoli, bell peppers, carrots, and cherry tomatoes on a large baking sheet. Drizzle with the olive oil, sprinkle with the salt, pepper, Herbs de Provence, and garlic. Toss until all the vegetables are well coated and spread into a single layer. Roast for 25-30 minutes, tossing once half way through, until vegetables are tender.

Meanwhile, bring a large pot of salted water to a boil. In the last 1o-12 minutes of the vegetables cooking, add the pasta to the water and cook till al dente, about 10-12 minutes.In the last 2 minutes of the pasta cooking, add the asparagus and the sugar snap peas to the water with the pasta as well. Reserve 1 cup of the pasta water and drain the pasta, asparagus, and sugar snap peas.

Add the roast vegetables to a large pasta bowl, followed by the pasta. Add the goat cheese and parmesan cheese on top of the pasta and toss thoroughly until the cheeses melt and coat all the pasta and vegetables, using the pasta water as needed to help spread the cheese out. Toss in the basil.

Serve into individual pasta bowls and sprinkle with additional basil and parmesan cheese!


Garlic Rosemary Chicken

Ciao! Johnny here with one of my most simple recipes that will quickly become a weeknight staple in your home: Garlic Rosemary Chicken. This dish is great for any time of year really, but I think it is most perfect for Fall and Winter on weeknights when you need something quick, simple, and inexpensive. Woodsy and earthy rosemary, pungent garlic, and fresh lemon flavor this easy chicken dinner in a way that is warming and hearty but also light. I love serving this throughout the cooler seasons with roasted butternut and acorn squashes, Brussels Sprouts, and steamed green beans. Hope you enjoy this easy weeknight classic!

Note: You can easy double and triple the recipe to accommodate how many people you are cooking for. I am providing directions to serve 2 people as I normally cook for 2 these days and know that many of you do as well.

Garlic Rosemary Chicken

  • Servings: 2
  • Difficulty: easy
  • Print

Ingredients:

  • 2 chicken breasts or thighs, bone-in and skin-on
  • 1 tablespoon extra-virgin olive oil
  • ¼ teaspoon salt
  • ½ teaspoon pepper
  • 1 tablespoon fresh rosemary, chopped
  • 1 tablespoon crushed garlic
  • Zest of half a lemon
  • 1 tablespoon lemon juice

Directions:

Preheat the oven to 400 ̊F.

Place the chicken on a baking sheet lined with foil. Drizzle with the olive oil and sprinkle with the salt and pepper. Top each piece with half the rosemary, half the garlic, and half the lemon zest. Using your hands, rub the ingredients all over the chicken making sure to get underneath the skin, stop when all looks well distributed. Drizzle with the lemon juice and actually place the lemon pieces you used for the juice near the chicken on the pan; it will help to perfume the dish and provide additional moisture.

Roast for 35-40 minutes until the chicken is golden brown. Serve with your favorite sides and enjoy!

Balsamic Glazed Salmon

I love salmon, it really is one of the greatest fishes; it’s incredibly healthy, it’s decently affordable, and it’s freaking delicious. One thing I love about salmon is that it can be ABSURDLY EASY to make. Take my Balsamic Glazed Salmon. Minimal prep, no active cooking, and only a few minutes until it is s ready for you to plate and eat. I am always getting questions about how to make salmon; this is the best way to start! Hope you enjoy!

Balsamic Glazed Salmon

  • Servings: 4
  • Difficulty: ridiculously easy
  • Print

Ingredients:

  • 1 ½ pounds boneless, skinless salmon slab
  • 1 teaspoon salt
  • 1 teaspoon pepper
  • 1 tablespoon crushed garlic
  • 1 teaspoon Herbs de Provence
  • 1 tablespoon olive oil
  • 3 tablespoons Trader Joe’s Balsamic Glaze or similar product

Directions:

Preheat the oven to 400 ̊F.

Spray or oil a 9×13 inch baking dish. Place the salmon in the baking dish. Sprinkle with salt, pepper, and Herbs de Provence. Spread the crushed garlic all over the salmon. Drizzle with olive oil. Drizzle the balsamic glaze all over, and with a pastry brush, spread the glaze until even and the salmon is covered.

Bake for 12-15 minutes depending on the thickness of the salmon. Cut into fillets and serve.

More Herbs, Less Salt Day

August 29th is unofficially celebrated as More Herbs, Less Salt Day. There are lots of “Food Holidays”, but I am particularly fond of the one’s that promote healthier living, like today! So what is More Herbs, Less Salt Day all about? It’s quite simple: it’s a day dedicated to raising awareness around the simple healthy swap of using more herbs to flavor your meals rather than salt.

In many countries, and especially America, people rely on obscene amounts of salt to flavor their meals. Salty fries, salty chips, salty meat, and even salty vegetables; it’s no wonder so many people have struggles with their sodium levels. Now don’t get me wrong, I love salt and good sea salt is a staple ingredient in my kitchen; but I know to add just enough to give the food a salty hint without stopping the blood in my arteries. Instead, I infuse flavor into my food through herbs and spices.

By including more herbs, fresh or dried, in our meals we are able to add even more flavor to our food, and get some health benefits along the way. Fresh herbs in particular all have really great health benefits. For example, fresh basil is packed with vitamin K and has anti-bacterial properties. Fresh parsley is rich in almost all of your essential vitamins, helps to detox the body, and strengthen the immune system. So each time you add fresh herbs to your meal, you’re benefiting your body and overall health! And bonus, you’re adding little to no calories to your food in exchange for tons of flavor! Who’s winning? You are!

See if you can start incorporating more herbs into your meals rather than salt and rejoice in the great flavors you will experience and the sense wellness you will experience afterwards!

What are some of your favorite herbs to use in your food? Tell me in the comments below!