Lunch

California Power Bowls

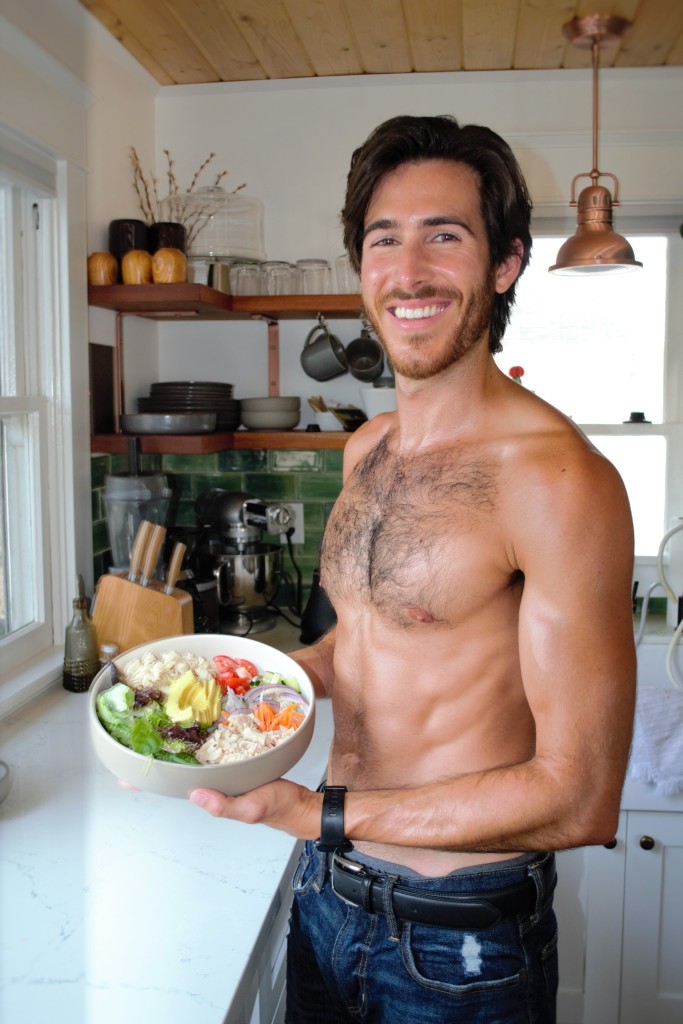
I am truly Californian – born and raised at the beach, a lover of summer, a practitioner of yoga and meditation, and a lover of fresh, healthy cuisine.  Most of my food is inspired by the Mediterranean and created with a California sensibility.  My California Power Bowls are a prime example of this – a perfect blend of Mediterranean and Californian ingredients and flavors designed to at once satisfy the nutritional needs of an active lifestyle and the desires of the taste buds.

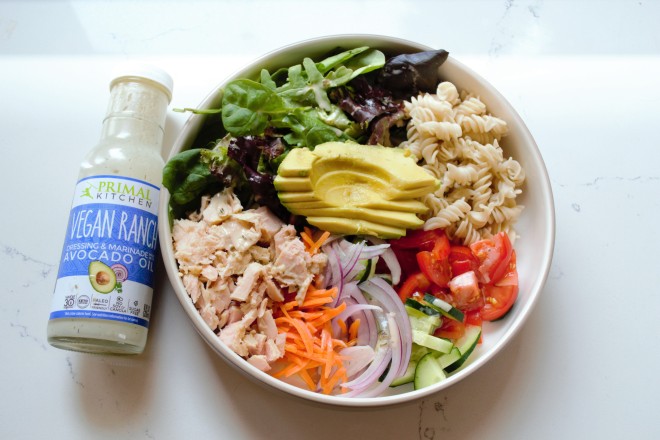
These bowls have everything going for them – tuna for lean protein, quinoa and brown rice pasta for complex carb fuel, greens and veggies for vitamins, fiber, and hydration, and avocado and avocado oil based dressing for heart healthy fats.  They are satisfying without being too filling, cooling and hydrating, and of course, tasty as hell!

The dressing I like to use for these bowls is Primal Kitchen’s Ranch DressingPrimal Kitchen produces salad dressings, mayos, marinades, and sauces all made from real food, organic ingredients without the nonsense you find in many other store bought options.  While many store bought dressings, mayos, and the like are made with refined oils like canola oil, Primal Kitchen’s products are made with avocado oil which is a superior oil rich in good fatty acids and vitamins.  All Primal Kitchen products are Paleo and Keto friendly and they have Vegan options as well.  Their ranch dressings have all the savory, cool flavors of classic ranch without the dairy and other processed ingredients and are the perfect topping for my California Power Bowls.  Order Primal Kitchen here!

Now, let’s make the California Power Bowls –


California Power Bowls
featuring Primal Kitchen’s Ranch Dressing

Serves: 1 | Prep Time: 10 minutes | Difficulty: Easy

Ingredients:

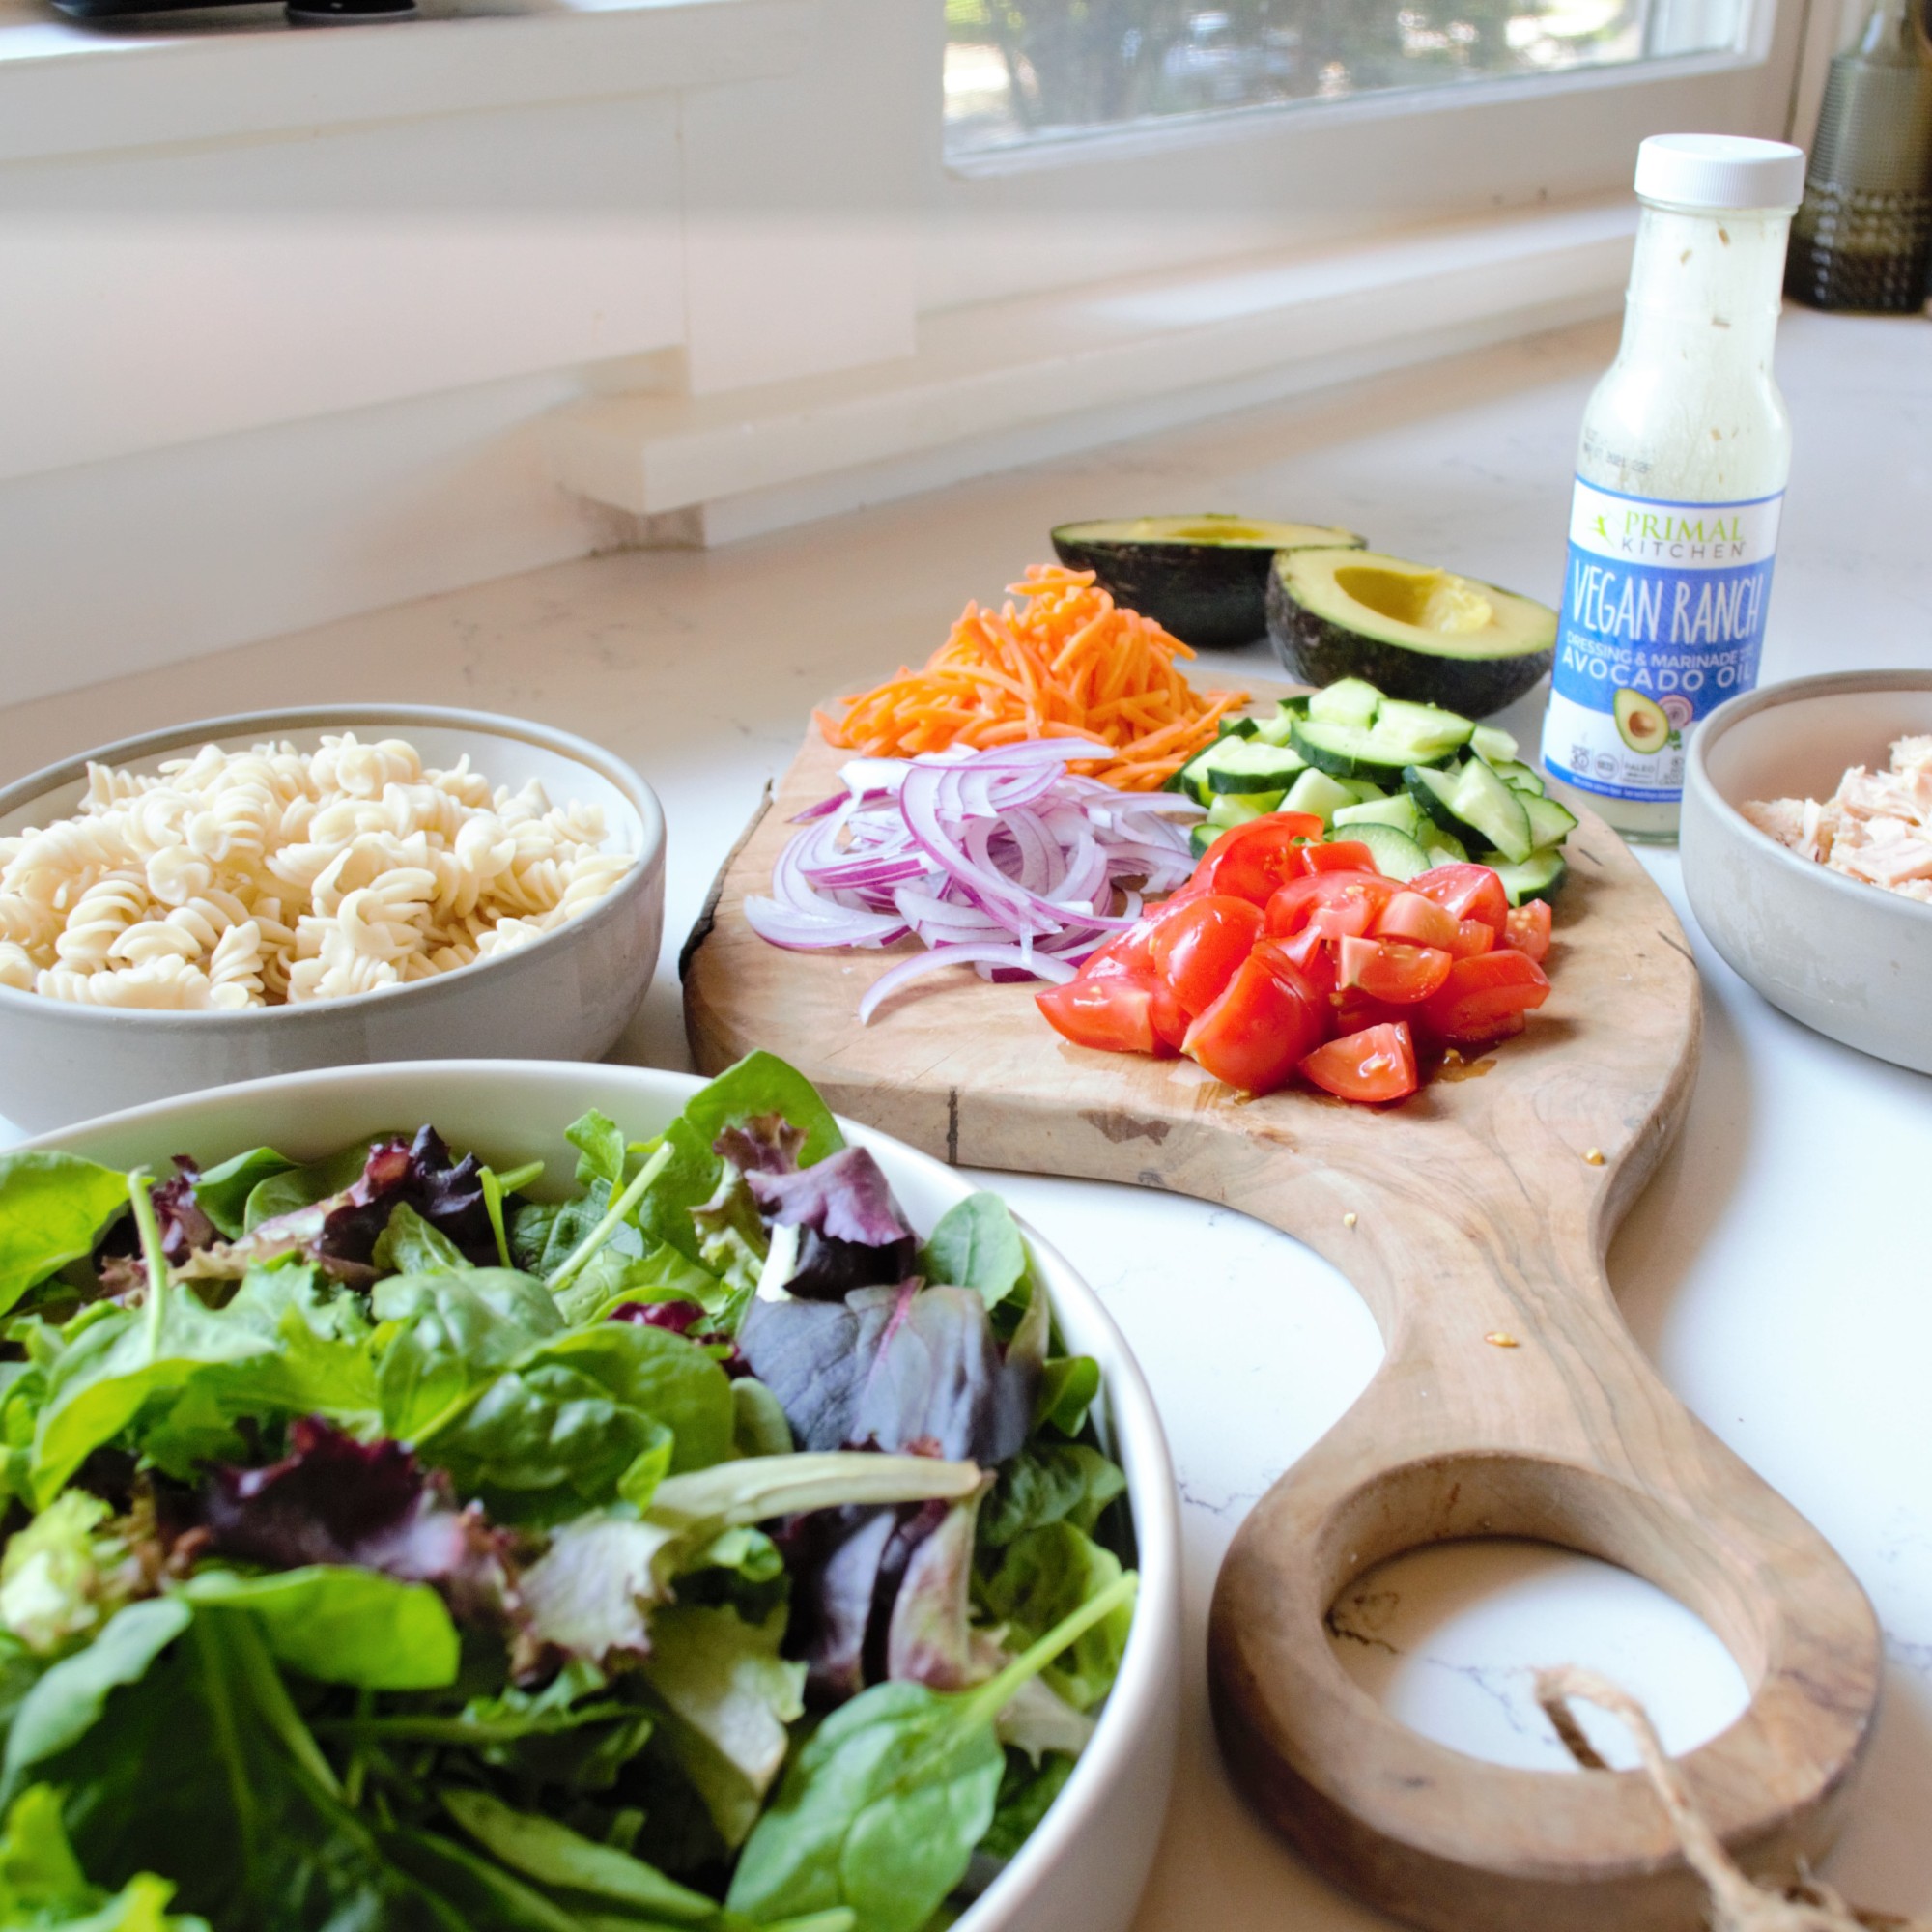
  • ½ can to 1 can of tuna in olive oil
  • 1 ½ cups salad greens
  • ½ cup tomato, chopped
  • ¼ cup cucumber, chopped
  •  ¼  cup red onion, sliced
  • ¼ cup shredded carrots
  • 1 cup quinoa, brown rice, or other gluten-free pasta, cooked and chilled
  • ½ medium avocado
  • 2 tablespoons Primal Kitchen Ranch Dressing

Directions:

Assemble ingredients tuna through pasta side by side in a large bowl.  Drizzle with Primal Kitchen Ranch Dressing.  Top with avocado.  Eat and enjoy!


Vegan Zoodle Pasta Salad

I love a good pasta salad, especially during summertime. A savory, chilled pasta salad is one of my go-to dishes for contributing to summer parties. A couple of years back I was invited to a summer gathering at which I knew several people with dietary restrictions would be in attendance – a few vegans, a couple of gluten-frees, and a paleo-er. I wanted to make a dish that all of these guests could eat, and that is when I came up with this Vegan Zoodle Pasta Salad.

This Vegan Zoodle Pasta Salad has everything going for it: it’s vegan, it’s gluten-free, it’s paleo-friendly, it’s veggie-full, it’s savory flavorful, and it’s cooling for the summer season. Make this recipe to share at summer bbqs and potlucks or for yourself to enjoy as a meal-prep lunch for several days. Bon appetito!


Vegan Zoodle Pasta Salad

Serves: 4-12 | Prep Time: 15 minutes | Difficulty: Easy

Ingredients:

  • 8-10 medium zucchini
  • 2 cups cherry tomatoes, halved
  • 1 cup red onion, thinly sliced
  • 1 cup roasted or fresh red bell pepper, sliced
  • 1 cup Kalamata olives, halved
  • 1/2 cup shredded carrots
  • 1 cup vegan pesto (I use Trader Joe’s Vegan Cashew Basil Pesto)
  • 1 teaspoon salt
  • Optional:
    • Add 1 cup chickpeas for protein (makes recipe not paleo)
    • Add vegan feta or mozzarella cheese (may make recipe not paleo)

Directions:

Spiralize the zucchini and spread the noodles out on a baking sheet. Sprinkle the noodles with the salt and allow to sit for 30 minutes. The salt will draw excess water out of the zucchini. Squeeze the noodles over a strainer in the sink until most of the water is released. Place the noodles in a large bowl. Add the pesto and toss well. Add remaining ingredients and toss well again. Serve and enjoy!


Visuals :


Spiralizers:

I have a Cuisinart CTG-00-SPI Spizalizer which can be purchased for under $40 here:

There are many other models out there at various price points for your selection. Search and find the best one for you!


Let me know my Vegan Zoodle Pasta Salad goes for you! Cmment below and/or tag me on Instagram @johnnylapasta

Slow Cooker Vegan Lentil & Spinach Stew

It’s been awhile since I created and shared a new recipe with you all. I have been in a bit of a culinary rut as of late, mostly cooking tried and true classics for the past couple of months. Today, however, I felt the urge to create something new on impulse and thus this Slow Cooker Vegan Lentil & Spinach Stew was born. I love a good plant-based soup, and particularly one that you can make entirely in the slow cooker, minimizing the active cooking time to almost nothing. This recipe ended up hitting all of the marks with its five minutes of prep and incredibly warming, earthy flavors and feel. I hope you enjoy it as much as I did!

Slow Cooker Lentil & Spinach Stew

  • Servings: 4-6
  • Difficulty: Absurdly Easy
  • Print

  • 1 onion, chopped
  • 2 carrots, chopped
  • 2 celery stalks, chopped
  • 2 tablespoons minced garlic
  • 1 1/2 cups green lentils
  • 1 15oz can crushed tomatoes
  • 4 cups vegetable broth
  • 2 teaspoons salt
  • 2 teaspoons pepper
  • 1 tablespoon cumin
  • 1 tablespoon paprika
  • 1 tablespoon turmeric
  • Pinch cayenne
  • 1 bay leaf
  • 2 cups Spinach
  • 2 tablespoons red wine vinegar

Directions:

Combine all ingredients onion thru bay leaf in a slow cooker. Stir to combine. Cook on low 6 hours or high 3 hours. When ready to serve, stir in the vinegar and spinach until wilted. Ladle into bowls and serve.

Cilantro-Lime Cauliflower Rice

Cauliflower Rice has been a thing for a good minute now, and I have been here for it for all of that minute. To me, plain white and brown rice is really just a vessel to soak up sauce or provide body and bite for another dish it is served alongside. In my opinion, neither colors of rice add anything special to any dish of their own accord, instead, they just add carbs. I have found that cauliflower rice provides that same texturized feel as white or brown rice and acts equally well as a supporting act to other dishes it is served with while also keeping the amount of carbs you are eating low (Disclaimer: carbs are great! You need carbs! They are essential to healthy functioning! But I prefer to get my carbs from other, more exciting sources than plain rice).

Furthermore, in my experiences working with cauliflower-rice, I have found that it has the potential to contribute its own something special to a meal or even stand alone. By its very nature, it seems to soak up flavors more readily, allowing it to act as a real stand-out side or even starring base.

This Cilantro-Lime Cauliflower Rice is one of my favorite ways to turn to this crucirferous vegetable into a gourmet tasting dish. The texture is just that of a crunchy yet chewy rice dish, but with a unique zesty and bright flavor profile. This recipe works as a great accompaniment to any sort of Mexican food: tacos, enchiladas, tequila-lime chicken, etc. It also makes a great base for a taco/burrito bowl style meal. It can even be served chilled as an additional base alongside lettuce in a salad.

This dish is incredibly simple to make, only requiring a few in expensive ingredients. By its very nature, it is also an incredibly healthy dish, full of the nutrition and benefits of cauliflower which include providing large amounts of vitamins, minerals, and fiber, cancer fighting properties, immune and digestive system support and much more. This dish is vegan, gluten-free, and paleo-friendly. It has become a staple recipe in my home, and now I am excited to share it with you!

Cilantro-Lime Cauliflower Rice

  • Servings: 4
  • Difficulty: Easy
  • Print

Ingredients:

  • 4 cups cauliflower rice *See Note*
  • 1 tablespoon olive oil
  • ½ medium red onion, diced
  • 2 tablespoons garlic powder
  • Zest and juice of 2 limes
  • ½ cup fresh cilantro, chopped
  • ½ teaspoon salt
  • ½ teaspoon black pepper

Directions:

Heat the olive oil in a large pan over medium heat. Once hot, add the onion, sprinkle with ¼ teaspoon salt and ¼ teaspoon pepper. Sautee until softened, about 4 minutes. Add the cauliflower rice, sprinkle with garlic powder, remaining salt, and pepper. Mix together and continue cooking, stirring occasionally for another 5 minutes, until the cauliflower goes from bright white to slightly golden. Turn off the heat, add the lime juice, zest, and cilantro. Mix well and serve.

*Note* You can make your own cauliflower rice by taking cauliflower florets from a large head of cauliflower, cutting away as much stem as possible and in 3 batches, break up the florets into a food processor and pulse until the mixture resembles couscous. OR you can just buy premade Cauliflower Rice; Trader Joe’s has the best.


A Paella Experience

As many of you may have seen if you follow me on social media, I was recently on holiday in Spain. I embarked on this Spanish adventure to see the beautiful and iconic sites, engage with the vibrant people and culture, and of course, I went to eat and drink A LOT. I enjoyed a truly unfathomable amount of sangria and indulged in Spain’s national dish, paella. Now, I will not recount every single meal I ate nor review every single restaurant that I dined in; if I did that, I would be on my way to publishing a travel guide. I will, however, share a wonderful experience I had; my Paella Cooking Class through Airbnb Experience.

159

I highly recommend Barcelona.

If you live under a rock and are unfamiliar with Airbnb, read about it here. For the rest of you who know Airbnb already, you might be surprised and delighted to learn that Airbnb now offers “Experiences” in which locals host an event, tour, or class of some kind that gives participants a taste of their city and community. Airbnb users visiting that city or community sign up and attend to join in the “experience” offered; it could be a hike through scenic hills followed by a picnic, a pub crawl, an art tour, or really anything that a host feels would be a good way to experience their homeland. The concept is unique and fantastic, offering travelers a chance to not only learn something new and/or do something fun under the guide of a local, but also the chance to meet up with other travelers! I think you should check it out.

Anyway, while I was in Barcelona, I noticed that Airbnb Experience was advertising a Paella Cooking Class. Upon further inspection, I learned that for just $30 I could attend this cooking class, instructed by a local cook, hosted in a professional kitchen, and learn to make sangria, paella, and a Catalan cream dessert, which I would then get to eat and enjoy. Sign me up and take my money! I was in.

The class was led by Eladi, a Catalonia-Spain native with a passion for cooking and drive to share traditional Spanish and Catalan cooking techniques with others. He believes in cooking with quality ingredients and infusing the food you cook with love and good energy; my kind of guy!

Paella 17

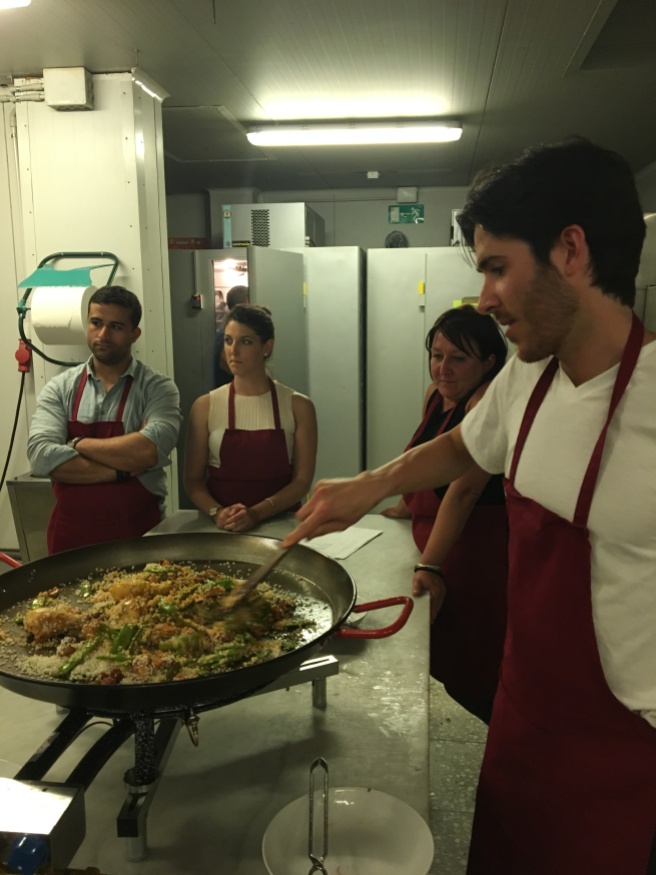
The class took place in the kitchen of a bakery which we were allowed to use for our cooking purposes. With it being a professional kitchen, we had plenty of space for our class (and bonus, the bakery happened to be a 1 minute walk from my Airbnb!) And so, under Eladi’s instruction, our group of nine Airbnb travelers gathered around a big center island in the kitchen and set out to learn!

Eladi taught us first to make the traditional, and dearly beloved, Spanish drink that we all know and love, Sangria. He gave us a little background on its origins and then divvied out tasks for a few of us to do: squeezing oranges, cutting apples, etc. I myself had never made Sangria and so I really enjoyed learning the basic measurements and techniques for making it because I would like to make and drink more Sangria on a normal basis (you know, for health reasons). Anyway, we mixed everything in a big pitcher and stored it away in the fridge to emulsify for the next couple of hours, with the promise of our being able to drink the sangria when it and dinner was ready!

See Eladi’s original recipe for traditional Sangria here: Sangria Recipe

Below, I have rewritten the recipe to be in the British-American recipe format and using American measurements.

Sangria

  • Servings: 6
  • Difficulty: easy
  • Print

Ingredients:

  • 4 cups red wine
  • 1 large apple, large cubed
  • 1 large orange, sliced
  • 1 large orange, juiced
  • 1 large lemon, sliced
  • 1 large lemon juiced
  • 2 sticks cinnamon
  • ¼ cup sugar
  • 2 cups soda water
  • Ice

Directions:

Pour the wine in a pitcher. Add the juices of the orange and lemon. Add the cubes of apple, slices of orange and lemon, and the cinnamon sticks. Add the sugar and stir. Allow to chill for minimum 2 hours to maximum 24 hours. To serve, add ice and soda water, serve, and pour.

Pro-Tip: Sangria really should be made with Spanish wine and if you are in the States, Trader Joe’s has this good, inexpensive choice! See below!

Spanish Paella

Paella 12

Next, we moved onto making the Catalan Cream for dessert, a very popular and traditional dessert in Spain’s region of Catalonia. It is essentially a custard made from milk, sugar, egg yolks, cinnamon, and lemon which is chilled in individual dishes, topped with sugar, then torched to create a sugar-glass crust. Think of a cross between flan and crème Brule, flavored with lemon and cinnamon; that’s Catalan Cream. Similarly, Eladi asked for volunteers to execute tasks like beating egg yolks and sugar together and so on. I am not a huge dessert eater or creator, so I really enjoyed adding this dish to my repertoire!

See the original recipe here: Catalan Cream Recipe

Again, below I have rewritten the recipe to be in the British-American recipe format with American measurements.

Catalan Cream

  • Servings: 6
  • Difficulty: intermediate
  • Print

Ingredients:

  • 4 cups milk
  • 2 cinnamon sticks
  • Peel of 1 whole lemon
  • 1 ½ tablespoons corn starch
  • 8 egg yolks
  • 1 cup sugar

Directions:

Place 3 cups of the milk, the cinnamon sticks, and the lemon peel in a small sauce pan and bring to a boil over medium heat. Once boil is reached, turn off the heat and allow flavors to infuse for 10-15 minutes. Discard the cinnamon sticks and lemon peel after this time.

Meanwhile, in a large bowl, beat the remaining 1 cup of milk, egg yolks, sugar, and starch until well mixed.

Add the egg mix to the sauce pan with the milk. Bring back to a boil over medium heat, continuing to whisk until the mixture starts to thicken, about 8 minutes. Turn off the heat and whisk 1 more minute.

Pour the mix into individual clay pots or ramekins and chill for 2-24 hours. When ready to serve, top each surface with an even layer of sugar, about a tablespoon, and using a blow torch, burn the sugar until a crust is formed. Serve and enjoy!

Paella 2

Finally, we embarked on cooking the main course, the highlight; traditional Spanish Paella! Here again, even with how big of a cook I am, I had never tried to cook paella, though I’d always wanted to. In this setting with Eladi as my guide, I was able to not only learn the techniques and basic measurements for paella, but also the culture around it. Here were some of the takeaways pertaining to paella:

  1. Paella is not always made with shellfish or seafood – Contrary to what you see online or television, Spanish families use whatever protein is available for when they would like a pan of paella, and that does not always involve expensive seafood. Similarly, paella can be made with different types of vegetables depending on the season, and paella can be completely vegetable based as well if you would prefer not to have animal protein. We had a chicken-only paella.
  2. Paella is a dish that is built in stages from the center out – Oil is heated at the center of the pan. Salt and garlic are added to the oil to season said oil which will in turn season and flavor the rest of the dish. Proteins are added and cooked at the center, then they are pushed out in a circle and vegetables are added to the center. This process continues until all the larger ingredients are cooked, after which the rice is added and cooked for a short time before it is drowned in broth and the remaining herbs and spices are added, at which point the paella is pretty much left alone until the rice absorbs the liquids.
  3. Paella is a communal dish – This was the most important takeaway I found. Paella is not traditionally something that the main cook in the family makes in private then serves to everyone else in the family when it is ready. Rather, the act of cooking paella is a group effort. Spanish families make an afternoon of paella, gathering in the kitchen, each person fulfilling a role in the cooking process. Much like in our cooking class, steps are divided out; someone cuts vegetables, someone grates tomatoes, someone prepares the herbs, someone mans the pan, etc. Everyone is involved in the preparation of this traditional dish and when it is finished cooking, everyone enjoys it all together, usually out of the same pan!


We each did our part in the cooking as we learned, we chatted and laughed, and after about an hour of all of this, the paella was finally ready. We poured ourselves glasses of our previously concocted sangria which was incredibly, beautifully smooth, and we were then ready to eat.

Eladi placed the giant paella pan in the middle of the kitchen island and handed out big wooden spoons that paella is commonly enjoyed with in Spanish households. Then, as is traditional, he drew lines in the paella to create pizza slice-like sections. We all chose our own section and dove in. Truly, that first bite of our communally cooked paella was divine. The flavor salty, slightly smoky, and very savory, the texture delightful to the tongue, the chicken juicy and rich. I had had paella a couple of other times while in Spain at this point, but this homemade paella definitely won out as the best paella I had on my entire Spanish adventure.

Paella Selfie.jpg

Furthermore, our group indulgence in this dish that we had all played a part in creating, our sharing in the dish all out of the same pan, made our eating more than just eating; it made it a special and memorable experience, as well as a delicious one.

See the recipe for Eladi’s Paella here: Paella Recipe

Once again, I have rewritten this recipe in a British-American recipe format with American measurements.

(You can take this recipe and get creative with your meats and veggies, as long as you have the basic measurements and techniques down.)

Paella

  • Servings: 4-6
  • Difficulty: intermediate
  • Print

Ingredients:

  • ¼ cup olive oil
  • Big pinch of salt
  • 4-6 garlic cloves
  • 1 ½ pounds chicken (whatever pieces you like, cut up)
  • 1 – 1 1/2 cups green beans, cut in half
  • 2 large tomatoes, grated
  • 2 tablespoons smoked paprika
  • Rice
  • 12 strands saffron, soaked in 3 tablespoons of warm water
  • 2 bunches rosemary
  • 2 ½ cups Bomba Rice
  • 6 cups chicken stock, warmed

Directions:

With the paella pan over low heat add the salt over the whole surface. Pour in the oil and allow to heat a minute. Add the garlic to the center of the pan and cook 1 minute. Add the chicken to the center and cook until browned, turning occasionally, about 5 minutes. Move the chicken away from the center. Add the green beans to the center and cook 2 minutes. Move the green beans away from the center. Add the grated tomato to the center and stir 1 minute. Add the paprika and mix everything in the pan together.

Add the rice all over the surface and stir with all the other ingredients for 1 minute. Add the hot chicken broth. Move the meat and vegetables to be arranged evenly throughout the pan. Distribute the saffron threads evenly throughout the broth. Add the rosemary bunches.

Raise the heat to medium-high until the broth boils. Then lower to the lowest possible heat while still continuing the boil, usually a medium-low. Watch the paella and when rice grains appear on the surface of the liquid, lower the heat to low. Cook until the rice is firm, but tender, about 10 minutes. Turn off the heat, cover with lid, and let stand 5 minutes.

Serve right out of the pan with wooden spoons!

Notes:

It is important to choose a quality paella pan and make sure that the pan can be placed somewhere where heat can be distributed evenly.

Needless to say, I greatly enjoyed our Paella Cooking Class through Airbnb Experience. It offered a chance for my friend Kayleigh and I to make new friends in our fellow travelers and also in Eladi. It allowed us to learn new dishes we had always been interested in cooking. And of course, it gave us a space to have fun and to have a delicious meal. Now home from Spain, I am very much inspired to purchase a Paella pan and have a “Paella Party” with all my friends, giving us all a chance to enjoy the communal and tasteful experience that the Spanish have created around Paella.

If you are traveling to Barcelona and are interested in taking this class with Eladi, please visit the following to see when and how you can join!

http://paella.experientz.com/

https://www.airbnb.es/experiences/51311

https://www.tripadvisor.com/Attraction_Review-g187497-d12246113-Reviews-Paella_Experientz_Barcelona-Barcelona_Catalonia.html
Fig, Goat Cheese, Prosciutto, and Arugula Pizza

One of my absolute favorite foods to make is artisanal pizzas; I love rolling the pizza dough into rustic, oblong shapes that are perfectly imperfect and then topping them with gourmet flavor combinations of quality ingredients. I don’t know exactly what it is that makes me enjoy cooking these types of pizzas so much, but I love the process of cooking them and am really proud of the original recipes I’ve developed!

A couple of my other artisan pizzas!

Most recently, I published my recipes for my Butternut, Brussels, and Bacon Pizza and my Bleu BBQ Chicken Pizza. Today, I giveth onto you the recipe for one of my favorites; my Fig, Goat Cheese, Prosciutto and Arugula Pizza – I know, it’s a mouth full literally and figuratively!

Can you say, “BELLISIMA!”???

Fig Pizza 14

This pizza is born of summer and is reminiscent of Tuscany in the warmer months. Imagine this; the sweetness of fresh figs, caramelized onions, and balsamic, contrasted with the saltiness of prosciutto and the tang of creamy goat cheese, and finished with the fresh and peppery bite of arugula. I am telling you, this is one incredible gourmet pizza!

Pour yourself a glass of wine and turn on the old world Italiano music, because with this pizza, you are about to feel like you’re enjoying a beautiful summer meal in the Tuscan countryside! Buon Appettito!

Fig, Goat Cheese, Prosciutto, and Arugula Pizza

  • Servings: 3-4
  • Difficulty: Easy
  • Print

Ingredients:

Cook’s Note: Vegetarians can certainly omit the prosciutto here to make this a veg friendly option! 

Directions:

Preheat the oven to 450°F.

On a floured surface, roll out the dough into a thin, oblong shape and place on an oiled baking sheet. (Pro-tip: sprinkle course cornmeal on the baking sheet to help prevent the pizza dough from sticking).

Drizzle the surface of the dough with the olive oil and balsamic. Use the back of a spoon to smear evenly over the dough. Arrange the caramelized onions in an even layer over the sauce. Sprinkle evenly with the mozzarella, goat cheese, and half of the basil. Arrange the fig slices and prosciutto pieces evenly across the pizza.

Bake for 20-25 minutes until the dough is golden brown, the cheese is melted and bubbly and the prosciutto is crisped. Sprinkle with remaining basil, then the arugula in an even layer.

Cut into rustic squares, sprinkle with parmesan, serve, and enjoy!

Balsamic Roma Tomatoes

I now find that I am asked for culinary advice and recipes for side dishes about as much as I am asked about main courses and entrees. So today, I want to give to you my recipe for a sensational summery side: my Balsamic Roma Tomatoes.

Balsamic Tomatoes 7

Juicy Roma (Plum) tomatoes, fruity olive oil, pungent garlic, sweet balsamic, and fresh basil make this one delectable side, even for the odd ball eater (black sheep) who shies away from tomatoes. This recipe is insanely simple, only taking about 5 minutes to prep, and is at once both sweet and savory. I find that these tomatoes are the perfect side for light and bright chicken and fish dishes like Chicken Piccata or Grilled Swordfish, but really you can make them with anything and all will love them.

Now get cooking my foodie friends!

Balsamic Tomatoes

  • Servings: 4
  • Difficulty: easy
  • Print

Ingredients:

  • 4 Roma Tomatoes (figure 1 tomato per person)
  • 1 tablespoon extra-virgin olive oil
  • 1 pinch salt
  • 1 pinch pepper
  • 1 tablespoon crushed garlic
  • 1-2 tablespoons balsamic vinegar
  • 2 basil leaves, torn
  • Grated Parmesan Cheese (optional)

Directions:

Preheat the oven to 400F and line a baking sheet with parchment paper.

Cut the tomatoes in half, length wise. Place on the baking sheet with the cut side facing up. Drizzle with the olive oil and sprinkle with the salt and pepper. Divide the crushed garlic evenly and place on top of the cut side of the tomatoes, smear around. Drizzle each tomato with a bit of the balsamic vinegar.

Place in the oven and roast for 25-30 minutes, until the tomatoes and slightly withered, juicy, and the balsamic is caramelized. Top with a few pieces of torn basil and if desired, sprinkle with Parmesan cheese. Serve and enjoy!


Bleu BBQ Chicken Pizza

We all love pizza. We all love BBQ. Thus, it makes sense to combine these two marvelous genres of foods, right?? Right! Almost every American-style pizza place (alla BJ’s Restaurant & Brewhouse and California Pizza Kitchen) has some sort of BBQ Chicken Pizza these days, and it fantastic; you really can’t go wrong with ordering one. I and many of my friends love BBQ chicken pizza so much that we have taken to making these BBQ flavored pies in our own homes because it really is so simple to make something so good and so beloved.

My dear friend and former blogging partner from my Confessions of Two College Foodies days, Nicole, first taught me how to make BBQ Chicken Pizza. Her and her family made a version very similar to that of California Pizza Kitchen and it was phenomenal; it quickly became a staple in my own household; for that recipe click here. Since then, however, I have sought to make a recipe that is unique to me so that I am not thieving!

Classic BBQ Pizza

Here is a throwback to the classic version, sans bleu cheese and peppers.

When developing this new recipe, I thought about some of the ingredients and flavors I like to add to more traditional BBQ dishes. When it comes to BBQ burgers, my favorite cheese is bleu cheese; the pungent tang of the bleu plays perfectly off of the sweet richness of BBQ sauce. I also enjoy adding the freshness of red and yellow bell peppers to BBQ dishes as they seem to really brighten up a thick BBQ feast. So, I have added those few ingredients to my friend’s original BBQ Chicken Pizza recipe to make this unique Bleu BBQ Chicken Pizza.

BBQ Chicken Pizza 16

The new Bleu BBQ Chicken Pizza! Could you resist???

This pizza is insanely easy to make, rather inexpensive, and completely delectable. This recipe is perfect for the summer months for those times when you need the texture and ease of a pizza but still want that summery, smokey BBQ flavor. I hope you enjoy!

Bleu BBQ Chicken Pizza

  • Servings: 3-4
  • Difficulty: easy
  • Print

Ingredients:

  • 1 pound store bought pizza dough, plain or wheat (I like Trader Joe’s dough)
  • 3/4 cup store bought BBQ sauce
  • 2 cups cooked chicken breast, chopped into cubes
  • 1 1/2 cups shredded mozzarella cheese
  • 1 cup bleu cheese crumbles
  • ½ medium red onion, sliced
  • ½ red bell pepper, sliced into strips
  • ½ yellow bell pepper sliced into strips
  • ¼ cup parsley or cilantro, chopped

Directions:

Preheat the oven to according the directions on your store bough pizza dough.

Roll out the dough into a thin, oblong shape and place on an oiled baking sheet. (Pro-tip: sprinkle course cornmeal on the baking sheet to help prevent the pizza dough from sticking)

Pour half the BBQ sauce on the surface of the dough and spread with the back of a spoon or a pastry brush in an even layer right up to the edges of the dough. Sprinkle the mozzarella and bleu cheese crumbles evenly over the pizza.

In a medium bowl, toss the cooked chicken in the remaining BBQ sauce and distribute evenly across the surface of the pizza. Arrange the sliced red onion and bell peppers all over the pizza.

Bake for 15-20 minutes until the dough is cooked golden and the cheese is melted and bubbling. In the last few minutes of cooking, sprinkle with the parsley or cilantro.  Remove from the oven and allow to cool a few minutes. Cut into rustic squares and serve!


Pasta Primavera

Sunday March 20th 2016 marked the bringing of another spring!

flower

YAY Spring is here!

Traditionally for the Spring Equinox, I always make my Pasta Primavera, and this past equinox was no exception. Pasta Primavera is a traditional Italian dish – Primavera means spring in Italian – and this dish is made all throughout the spring to celebrate the fresh produce that has come into season and harvest after the winter. I love making Pasta Primavera because it is simple, it is elegant, it supports seasonal eating, and it is actually quite healthy since it is loaded with lots of fresh vegetables and herbs.

food jennifer lawrence

Because a season change just means an excuse to eat more foods.

Sound good? I know you want to make it. Great! Well, you should make MY recipe for Pasta Primavera. Whereas many other recipes for this springtime dish call for boiling, steaming, or sauteing the vegetables within it, I roast them to really intensify the flavors because roasting brings out the best in vegetables. I also add goat cheese to this dish to bring a bright tang that I think is indicative of spring which gives the dish a slight richness and definite creaminess.

It is so simple and inexpensive, yet so fresh, bright, and absolutely delicious; I think you should definitely make my Pasta Primavera, and make it often! Buon Primavera!

Pasta Primavera

  • Servings: 3-4
  • Difficulty: easy
  • Print

Ingredients:

  • 2 large broccoli crowns, cut into small florets
  • 1 red bell pepper, sliced and cut into 2 inch strips
  • 1 yellow bell pepper, sliced and cut into 2 inch strips
  • 2 large carrots, sliced and cut into 2 inch sticks
  • 1 pint cherry tomatoes, halved
  • 1 tablespoon crushed or minced garlic
  • 10 medium thick asparagus spears, cut to two inches
  • 15-20 sugar snap peas
  • 1 cup basil, julienned
  • ½ pound Farfalle (bowtie) pasta or other short cut pasta
  • 1-2 tablespoons extra virgin olive oil
  • 2 tablespoons Herbs de Provence
  • ¼ cup goat cheese
  • ¼ cup grated Parmesan Cheese
  • ½ teaspoon salt
  • 1/2 teaspoon pepper

Directions:

Preheat the oven to 400̊F.

Arrange the broccoli, bell peppers, carrots, and cherry tomatoes on a large baking sheet. Drizzle with the olive oil, sprinkle with the salt, pepper, Herbs de Provence, and garlic. Toss until all the vegetables are well coated and spread into a single layer. Roast for 25-30 minutes, tossing once half way through, until vegetables are tender.

Meanwhile, bring a large pot of salted water to a boil. In the last 1o-12 minutes of the vegetables cooking, add the pasta to the water and cook till al dente, about 10-12 minutes.In the last 2 minutes of the pasta cooking, add the asparagus and the sugar snap peas to the water with the pasta as well. Reserve 1 cup of the pasta water and drain the pasta, asparagus, and sugar snap peas.

Add the roast vegetables to a large pasta bowl, followed by the pasta. Add the goat cheese and parmesan cheese on top of the pasta and toss thoroughly until the cheeses melt and coat all the pasta and vegetables, using the pasta water as needed to help spread the cheese out. Toss in the basil.

Serve into individual pasta bowls and sprinkle with additional basil and parmesan cheese!


Butternut, Brussels, and Bacon Pizza

I am a human being, and therefore, I LOVE PIZZA! I love it all; round pizza and oblong pizza, thick crust and thin crust, plain cheese and the works, and so and so on.

eat pray love pizza

However, I have a particular pro-potency for rustic, artisanal pizzas; pizzas whose dough has been rustically rolled and topped with quality toppings in unique and artistically flavorful ways. I have a few artisan style pizzas that I make at home when I haven’t had pizza in a minute and will die if I do not get some in my system, and this Butternut, Brussles, and Bacon Pizza is quite possibly the best of them!

Butternut Brussels Bacon Pizza 2

BAM! Look at that!

Roasted butternut squash and Brussels sprouts, crispy bacon, caramelized onions, balsamic reduction, and mozzarella and Parmesan cheeses all come together to create a fully-loaded and totally delectable pizza. Sweet balsamic reduction, caramelized onions, and tender butternut squash are contrasted by smoky, salty, and earthy bacon bits and Brussels sprouts which are married by mild gooey mozzarella and of course the ever distinctive Parmesan. It’s crispy, crunchy, and hearty all at once. Honestly, this is a pizza that could be served at a high-end restaurant off the “fancy” (boogie) pizza menu for a pretty penny, but you can make this in your home for under $15 for 4 people.

Ever since making this pizza this past winter, it has become an instant go-to for pizza night because it so deeply enjoyable! Serve with a nice salad and a glass of wine, and you are in for the perfect pizza experience!

Butternut, Brussels, and Bacon Pizza

  • Servings: 3-4 people
  • Difficulty: intermediate
  • Print

Ingredients:

  • 1 pound your favorite pizza dough (I use Trader Joe’s Whole Wheat Dough)
  • ¼ cup extra virgin olive oil
  • 2 cups Brussels Sprouts, quartered
  • 1 ½ cups butternut squash cut into small cubes
  • 4-5 strips bacon
  • 2 yellow onions, sliced thin
  • 1 ½ cup shredded mozzarella cheese
  • ½ cup parmesan cheese, grated
  • 2 tablespoons balsamic glaze (I use Trader Joe’s)
  • Salt and pepper

Directions:

Prep work on the toppings for the pizza –

Preheat the oven to 425̊F. Place the Brussels sprouts and butternut squash on a baking sheet, drizzle with 2 tablespoons of the olive oil and sprinkle liberally with salt and pepper. Toss together, roast for 25-30 minutes until the squash is tender and the Brussels sprouts are crispy.

Cook the bacon your favorite way until crisp. Cool and break into ½ inch bits. (I cook my bacon on a baking rack in the oven, so much easier!)

In a medium pan, heat 1 tablespoon of the olive oil over medium heat. Add the onions. Sprinkle with a pinch of both salt and pepper. Cook for 25-30 minutes, stirring often, until the onions are caramelized. (Tip: Add a tablespoon of water if the pan starts to get too sticky)

Assembling the pizza –

Turn up the heat to 450̊F. Roll out the dough into a 12-14 inch long rectangle or oblong shape, making the thickness about ¼ inch thick (that’s quite thin).Place on a baking sheet that has been sprayed or rubbed with a bit of oil and sprinkled with a couple tablespoons of cornmeal.

Drizzle the remaining 1 tablespoon of the olive oil over the surface of the crust followed by the balsamic glaze. Using the back of a spoon, spread the oil and glaze all over the crust evenly.

Sprinkle with 1 cup of the mozzarella and ½ of the parmesan. Spread the caramelized onions over the cheese. Spread the butternut squash and Brussels sprouts over the onions. Sprinkle the bacon bits over the vegetables. Top with the remaining cheeses.

Bake for 15-20 minutes, until the cheese is melted and bubbly and the outer rim of the crust is golden brown.

Remove to a cutting board, slice into rustic squares, and serve!