Recipes

Meatloaf Calabrese

The word “Meatloaf” often harkens traumatic images of your mom’s signature recipe for the nights where she literally didn’t give a _________ and threw some protein, carbs, and other questionable fixings into a bowl, baked it, and called it dinner.

ewwww

She’s making meatloaf again???

And so, sadly, meatloaf often gets a bad rap. I, however, can assure that not all meatloafs are created equal. I grew up on my mom’s meatloaf and always jumped for joy when I found out that she was cooking it. But of course, my mother is Italian so the meatloaf was undeniable phenomenal. Well, now you can have phenomenal meatloaf too because I am gifting the recipe to you!

Meatloaf 9

Italians do everything better.

Yummm

This is Meatloaf Calabrese. My Italian family is from Calabria in Italy (things from Calabria are called Calabrese) and this recipe comes from there. Actually, the base of this recipe is for our Stuffed Bell Peppers which are a tad more elegant. Of course, when they came to America, they created a meatloaf incarnation of the dish that was more convenient for busy American weeknights. You will notice that this recipe calls for raisins in addition to beef, red pepper flakes, and other such ingredients; so you are probably thinking, “What in the damn hell?”

raisins and beef

Raisins and beef!?

Trust me, it is delicious. Savory beef and herbs, spicy red pepper and onion, and sweet raisins and tomato all work to complement, contrast, and balance each other PERFECTLY. This meatloaf could honestly be fed to royalty and they would knight the cook.

Now, about the “recipe”. Remember when I started this blog and I told you that not all my recipes provide precise measurements because of the Italian tendency to just feel the dish out as you go? Yeah, well that applies here. This is a recipe that you just have to touch and feel, adjusting as you go. I’ve never been able to get a straight answer about measurements for this dish.

just feel it

Just touch it…

I ask, “How much tomato sauce?” The response I get is, “I don’t know, you just have to touch it and you will figure it out!” So that is what I do and so I have never found myself able to fully break down the recipe. Sometimes I find it needs a touch more this or that. I look, I touch, I feel, I sense, I am guided by my great nonna Isabella. So this recipe is for those who feel pretty confident in the kitchen and are open to a little experimenting with out provided precise measurements.

Here’s the trick though, you’ve got to cook it with love for the people you are cooking for and passion for the quality ingredients you are using to nourish your body and satisfy your soul. If you infuse the food with this love and positive energy, it’s going to turn out great no matter.

cheers.gif

Let me know it goes! Buona Fortuna and Buon Appettito!

Meatloaf Calabrese

  • Servings: 4-6
  • Difficulty: easy
  • Print

Ingredients:

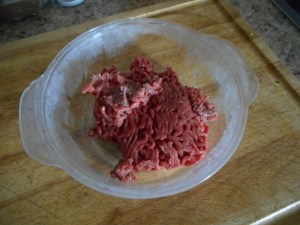
  • 1 pound grass-fed, organic ground beef
  • About ½ cup diced tomatoes, drained
  • 2 tablespoons tomato paste
  • 1 cup marinara sauce
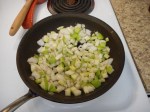
  • ½ large yellow onion, chopped
  • 1 tablespoon crushed garlic
  • About ¼ cup Italian parsley, chopped
  • 2 teaspoons dried Italian seasoning
  • 1 pinch red pepper flakes
  • 1 egg
  • 2 slices of bread
  • Splash red wine
  • ½ cup raisins
  • 3/4 cup parmesan cheese grated
  • ¾ cup grated mozzarella cheese
  • 1 zucchini shredded or 1 Portobello mushroom thinly sliced
  • Salt and Pepper

Directions:

Preheat the oven to 375̊ F.

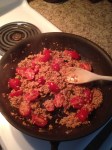
Put the beef, tomatoes, tomato paste, 2 tablespoons of the marinara, onion, garlic, parsley, Italian seasonion, red pepper flakes, a ¼ teaspoon of both salt and pepper, 1/3 cup of the parmesan cheese, the wine, and the egg in a large bowl.

Toast the bread, lightly wet with water from the sink. Remove the crusts and squeeze the liquid out until you are left with a mushy crumble. Throw in the bowl with the other ingredients.

Mix by hand until ingredients are well combined. Add the raisins and mix again until the raisins are well distributed.

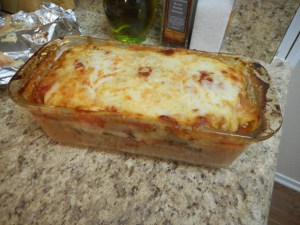
Grease a meatloaf dish with olive oil. Add ½ of the meat mixture. Layer on the zucchini or mushrooms over the meat. Sprinkle with half of the mozzarella cheese over the vegetables. Add the rest of the meat mixture. Over with ¼ cup of the marinara. Sprinkle with remaining mozzarella and parmesan cheese

Bake for 1 hour until the cheese is melted and bubbling. Serve with additional marinara sauce as desired. Enjoy!

Vegan Cauliflower, Mushroom, and Red Bean Chili

As an avid supporter of Meatless Monday and the concept that we can eat less meat and also go about the cultivation of the meat that we do eat in a more sustainable way, I am constantly looking to try new and exciting vegetarian and vegan dishes. I love eating at vegan restaurants and seeing what they’ve come up with and I myself really enjoy making vegan and vegetarian dishes; in fact, some of my most popular recipes are vegan like Johnny’s Tomato Soup.  I do, however, often get stuck in a rut when it comes to cooking vegan for myself. I usually rely on another cook’s book or blog to tell me what to do. One day, however, I decided to be adventurous and experiment in the kitchen using ingredients that I love and crossed my fingers that a great vegan dish would be born from all of it. Lo and behold this chili happened!

What I love about this chili is that it is incredibly hearty in texture, flavor, and feel when in all reality; it is an extremely light and nutritious veggie packed dish. Chunks of Portobello mushrooms mimic chunks of beef that you might find in one chili. Finely chopped cauliflower emulates ground meat that you might find in another chili. Other veggies and spices give the stew a rich and warming flavor profile. The result is a chili that is thick and filling while also bringing the nutrition without any animal products.

I loved this chili so much; I made it two weeks in a row and knew that I had to share it with you! I hope you enjoy this new vegan friendly dish from yours truly. Buon Appetito!

Vegan Cauliflower, Mushroom, and Red Bean Chili

  • Servings: 4-6
  • Difficulty: easy
  • Print

Ingredients:

  • 2 tablespoons olive oil
  • 1 large yellow onion, chopped
  • 1 large carrot, chopped
  • 1 large celery stalk, chopped
  • ½ a green bell pepper, chopped
  • 1 tablespoon crushed garlic
  • 1 large Portobello mushroom, big diced
  • 3 cups cauliflower, chopped into tiny pieces
  • 1 tablespoon fresh sage, chopped
  • 1 ½ tablespoons chili powder
  • 1 teaspoon paprika
  • 1 teaspoon cumin
  • 1 pinch red pepper flakes
  • 1 can of red kidney beans, drained and rinsed
  • ½ can diced tomatoes with juice
  • 3-4 cups vegetable stock
  • Salt and Pepper

Directions:

Heat the olive in a large pot over medium-high heat. Add the onions, carrot, celery, and bell pepper with a pinch of salt and pepper. Cook until tender, about 4 minutes. Add the mushrooms, cook until tender, another 3 minutes. Add the garlic, cook 1 minute. Add the cauliflower and sage, sprinkle with additional salt and pepper, and stir to combine. Add the chili powder, paprika, cumin, and red pepper flakes. Coat the veggies in the spices and cook for 2 minutes. Add the beans, tomatoes, and vegetable stock. Season with salt and pepper. Bring to a boil. Reduce heat to low, cover, and allow to simmer for 30-40 minutes. Serve and enjoy!


Christmas Biscotti

Truthfully, I am not a huge baker and much more of a cook. When it’s Christmas time, however, I do enjoy donning on an apron, covering myself in flour, and whipping up a few sweet holiday treats. Like any sane human, I love baking and eating Christmas cookies. But with so many people opting for traditional holiday favorites like sugar cookies, I like to make something a little bit different when I make the effort to bake up some Christmas cheer.

My original Christmas Biscotti gives me the satisfaction of Christmas baking while paying homage to my Italian roots. Ever since I developed this recipe about 7 years ago, these biscotti have become a friend and family favorite I bake and share every December. This is one of my original recipes I very much look forward to sharing with my children one day!

My Christmas Biscotti are just the right amount of sweet and satisfyingly crunchy! With red from tart dried cranberries, green from earthy pistachios, a bit of warm orange zest, a splash of lively amaretto, and rich dark chocolate, these biscotti look and taste like Christmas! Try them with a nice cup of coffee, tea, or hot cocoa for an optimally festive experience.


Christmas Biscotti

Serves: 12–14 Cookies | Prep Time: 2 Hours | Difficulty: Easy

Ingredients:

  • 2 cups all-purpose flour
  • 1 ½ teaspoons baking powder
  • ¾ cup sugar
  • 1 ½ tablespoons orange zest
  • ½ cup salted butter, at room temperature
  • 2 eggs, at room temperature
  • 2 teaspoons Amaretto liqueur
  • ½ cup pistachios, roughly chopped
  • ½ cup dried cranberries
  • ½ cup dark chocolate chips
  • Optional: 1 cup dark chocolate chips to make glaze

Directions:

Preheat the oven to 350 F.

In a small bowl, whisk together the flour and baking powder.

In a large bowl, beat the sugar, butter, and orange zest with a hand mixer until a crumb-like texture is formed. Add one egg at a time and beat until completely incorporated. Mix in the Amaretto liqueur. Working in thirds, add the flour mixture and beat together until all ingredients are mixed and dough starts to form. Add the pistachios, cranberries, and chocolate chips until well distributed throughout the dough.

Place the dough in the center of the baking sheet lined with parchment paper and form a log that is 13 inches long and 3 inches wide. Bake for 40-45 minutes until the log is golden brown. Remove from oven and baking sheet and allow to cool for 30 minutes.

Using a sharp or serrated bread knife, slice the log in ½ inch to ¾ inch slices (be careful as the slices will be quite fragile). Place the slices with cut side down on the baking sheet and bake an additional 15-20 minutes until golden brown. Remove from oven and allow to cool completely on a baking rack.

Optional: melt the 1 cup of dark chocolate in a double boiler. Pour the melted chocolate onto a plate. Dip the flat bottom of the biscotti in the melted chocolate and set aside until the chocolate hardens. Enjoy!

Buon Natale!


Making this recipe? Post a pic on Instagram and tag me with @johnnylapasta! Also, let me know what you think in the comments below!

Easy Bolognese

I don’t know about you, but I don’t find anything as comforting as a bowl of pasta with a rich, hearty meat sauce (sorry vegetarians, I practice Meatless Monday and yoga, but I am Italian thru and thru). When I was growing up my mom often made pasta with Bolognese sauce when it was chilly outside. Curling up with that bowl of pasta and watching a good movie was simply the best…and it still is! Bolognese is something I now make on the regular during Fall and Winter. It’s inexpensive, simple, rustic, hearty, and it can actually be decently nutritious if you use grass-fed organic meat and control your portions.

Now, there are lots of Bolognese sauce recipes in the world and some of them can be slightly complicated and require hours of cooking, but my recipe for Bolognese is fantastically easy and rather quick! Serve with your favorite shape of pasta, on spaghetti squash, or even by itself in a bowl with some crusty bread. My Easy Bolognese will quickly make you feel like you’re dining in Tuscany! Buon Appetito!

Easy Bolognese

  • Servings: 4-6
  • Difficulty: easy
  • Print

Ingredients:

  • 3 tablespoons olive oil
  • 1 large onion, chopped
  • 1 large carrot, chopped
  • 1 large celery stalk, chopped
  • 2 tablespoons crushed garlic
  • ½ lb ground beef (preferably grass-fed organic) (or substitute 1 lb Beyond Meat Beef Chunks!)
  • ½ lb ground pork (preferably grass-fed organic) (or skip if you use 1 lb Beyong Meat Beef Chunks!)
  • ½ cup red wine (preferably a chianti or darker)
  • 1 28 oz can crushed tomatoes
  • 1 tablespoon tomato paste
  • ¼ cup fresh flat leaf Italian parsley, chopped
  • 2 tablespoons fresh basil, chopped
  • 1 bay leaf
  • 1 pinch red pepper flakes
  • Salt & Pepper
  • ¼ Pecorino Romano Cheese

Directions:

Heat the oil in a large skillet over medium-high heat. Add the onions, season with a pinch of salt and pepper, and sauté for about 5 minutes until tender. Add the carrots, celery, and 1 tablespoon of the crushed garlic, season with an additional pinch of salt and pepper, and sauté for 3-4 minutes longer. Add the beef and pork. Using the back of a wooden spoon, break the meat up into small chunks, cook until the meat is browned and slightly caramelized, about 7-8 minutes. Pour in the red wine and cook until the meat absorbs the wine completely. Add the crushed tomatoes, tomato paste, remaining 1 tablespoon of garlic, half the parsley, the basil, the bay leaf, the red pepper flakes, a pinch more salt and pepper, and half of the pecorino cheese. Stir together. Allow to come to a simmer. Reduce the heat the medium-low and cook uncovered for 45 minutes to an hour until sauce is slightly thickened. Serve with the remaining pecorino and parsley. Enjoy!

Pro-tip: If you make pasta or spaghetti squash, toss the pasta or shredded squash with additional pecorino cheese and olive oil, then place into pasta bowls, and serve the Bolognese sauce over the top. Allow the guests to mix the sauce into the noodles or squash as they like on their own.


Johnny’s Tomato Soup

Ciao all! Johnny here with my inexpensive, unbelievably simple, super healthy, and incredibly delish recipe for my Tomato Soup! There is no way around it – tomato soup is one of the most comforting dishes you can enjoy. A bowl of tomato soup comforts you when you’re feeling under the weather or helps you to cozy up with a good movie or book on a chilly evening in at home. Well I daresay my tomato soup will be your new favorite!

With budget friendly ingredients and minimal efforts, this soup is vegan, gluten-free, and overall healthy while also being rich and hearty. Cannellini beans within the soup pureed after cooking give the soup a creamy texture without the need for dairy. Rosemary, red pepper, and bay leaf give the soup earthy and warming notes.

This soup makes a great quick weeknight dinner and is perfect to take a left over cup to work or school. Hell, it’s even perfect for a Friday night with a good movie and bottle of wine! I make this soup almost every other week during Fall and Winter and anyone who has ever had it has always been thoroughly pleased. I hope you enjoy!


Johnny’s Tomato Soup

Serves: 4-6 | Prep Time: 40 minutes | Difficulty: Easy

Ingredients:

  • 2 tablespoons olive oil
  • 1 medium yellow onion, chopped
  • 1 large carrot, peeled and chopped
  • 2 tablespoons crushed garlic
  • 1 15 ounce can cannellini beans, drained and rinsed
  • 1 15 ounce can crushed tomatoes
  • 1 tablespoon tomato paste
  • 4 cups vegetable stock
  • 1 ½ teaspoons fresh rosemary, chopped
  • ¼ -1/2 teaspoon red pepper flakes
  • 1 bay leaf
  • Salt and Pepper
  • Optional Toppings: Olive oil drizzle, cracked black pepper, light sour cream, Greek yogurt, parmesan cheese, goat cheese

Directions:

Heat the olive oil in a pot over medium-high heat until hot. Add the onions and carrots, sprinkle with a ¼ teaspoon of salt and pepper. Sauté for 5 minutes until tender. Add the crushed garlic, mix together, and sauté an additional 2 minutes.

Add the cannellini beans, crushed tomatoes, tomato paste, vegetable stock, rosemary, red pepper flakes, and bay leaf. Season with salt and pepper to taste and stir. Bring to a boil over the medium-high heat. Cover, reduce heat to low, and simmer for 30 minutes.

Uncover and fish out the bay leaf, discard. Using an immersion blender, puree the soup until smooth and creamy with no chunks of veggies left. You can also puree in a food processor, but be very careful! Ladle into bowls and add your desired toppings. I personally like to do an artsy drizzle of olive oil and add some crushed black pepper to keep it light but tasty. Enjoy!


Like this recipe? Let me know in the comments! Did you make this recipe? Tag me on Instagram @johnnylapasta!

Garlic Rosemary Chicken

Ciao! Johnny here with one of my most simple recipes that will quickly become a weeknight staple in your home: Garlic Rosemary Chicken. This dish is great for any time of year really, but I think it is most perfect for Fall and Winter on weeknights when you need something quick, simple, and inexpensive. Woodsy and earthy rosemary, pungent garlic, and fresh lemon flavor this easy chicken dinner in a way that is warming and hearty but also light. I love serving this throughout the cooler seasons with roasted butternut and acorn squashes, Brussels Sprouts, and steamed green beans. Hope you enjoy this easy weeknight classic!

Note: You can easy double and triple the recipe to accommodate how many people you are cooking for. I am providing directions to serve 2 people as I normally cook for 2 these days and know that many of you do as well.

Garlic Rosemary Chicken

  • Servings: 2
  • Difficulty: easy
  • Print

Ingredients:

  • 2 chicken breasts or thighs, bone-in and skin-on
  • 1 tablespoon extra-virgin olive oil
  • ¼ teaspoon salt
  • ½ teaspoon pepper
  • 1 tablespoon fresh rosemary, chopped
  • 1 tablespoon crushed garlic
  • Zest of half a lemon
  • 1 tablespoon lemon juice

Directions:

Preheat the oven to 400 ̊F.

Place the chicken on a baking sheet lined with foil. Drizzle with the olive oil and sprinkle with the salt and pepper. Top each piece with half the rosemary, half the garlic, and half the lemon zest. Using your hands, rub the ingredients all over the chicken making sure to get underneath the skin, stop when all looks well distributed. Drizzle with the lemon juice and actually place the lemon pieces you used for the juice near the chicken on the pan; it will help to perfume the dish and provide additional moisture.

Roast for 35-40 minutes until the chicken is golden brown. Serve with your favorite sides and enjoy!

Stuffed Acorn Squash

A few years ago, my best friend Kayleigh had me and a few of our other friends over for dinner during the Fall season. She was cooking up a storm in the kitchen with all sorts of ingredients: onions, apples, sausage, sage – all things I love. I asked, “What are you making?” Her response was very in character; nonchalantly she answered, “I’m not sure. Some sort of stuffed acorn squash. We’ll see what happens.” I laughed because this was very like her to just whip something up and go with the flow with confidence that all would be well; and all was well indeed! The Stuffed Acorn Squash turned out truly and utterly phenomenal and from that point on it became a traditional Fall and Winter dish between us and our families.

I have since made this dish many times throughout the Fall and Winter seasons because it is truly these seasons in one exquisite meal. The sweet squash is stuffed and balanced by spicy Italian chicken sausage, savory onions, tart green apple, fresh celery, woodsy sage, and pungent garlic; each component balancing and complimenting the other perfectly. A bit of bread crumbs provides a nice crunch to contrast the softness of the squash and sausage, and melted Havarti cheese seals and completes with a buttery finish. Honestly, this is one of my favorite meals to make during the cooler seasons. It is relatively simple to prepare, decently inexpensive, festive, comforting, and downright delicious. I truly hope you enjoy this recipe in your own home with loved ones.

Stuffed Acorn Squash

  • Servings: 4
  • Difficulty: easy
  • Print

Ingredients:

  • 2 acorn squashes
  • 1 pound hot Italian chicken sausage, casings removed
  • 1 large onion, chopped
  • 1 large celery stick, chopped
  • 1 large granny smith apple, diced
  • 1 teaspoon crushed garlic
  • ¼ cup white wine
  • 4 sage leaves, julienned
  • 1 pinch red pepper flakes
  • ¼ cup panko breadcrumbs
  • 1 block Havarti cheese, thinly sliced
  • ¼ cup extra virgin olive oil
  • Salt and Pepper

Directions:

Preheat the oven to 425̊F.

Cut the acorn squash down the center length wise. With a spoon, remove the seeds and dig the cavity till it would be able to hold ¾ cup of water. Drizzle the insides with 1 tablespoon of olive oil and season with about ¼ teaspoon of salt and pepper each. Place on a greased baking sheet with the inside facing down. Drizzle the skin with an additional tablespoon of olive oil and season with an additional pinch of salt and pepper. Place in the oven and bake for 35-40 minutes until the skin is easily pierced with a knife.

In the meantime, heat the remaining olive oil in a large pan over medium-high heat. Add the onion, celery, and green apple. Season with a pinch of salt and pepper. Saute for 5-7 minutes until tender. Add the sausage and break into small chunks using the back of a wooden spoon. Cook until the sausage is browned. Add the garlic, sage, and red pepper flakes. Add the wine and continue cooking until the liquid has evaporated. Remove from the heat and stir in the breadcrumbs until well mixed. Season with additional salt and pepper to taste.

Remove the acorn squash from the oven and flip over so that the cavity side facing up. Stuff each cavity with the mixture from the pan until filled and slightly doming over. Top completely with the cheese slices. Place back in the oven for 5-10 more minutes until the cheese is melted, bubbling, and browned.

Remove, allow to cool a few minutes, and serve – 1 half of a squash per person! This is best served with a simple green salad and some wine. Hope you enjoy!

Note: The images below are from when I cut the recipe in half to just serve 2, but the steps are the same.

What’s your favorite Fall/Winter dish to make at home?

Pasta di Janet

Growing up, my mom made my family quite a bit of pasta for dinner, being herself a 2nd generation Italian-American; and it was glorious. I remember being in high school, coming home starving from various practices and rehearsals, only to be fulfilled by a bowl of one of my mother’s pasta dishes. This particular dish, which I have deemed Pasta di Janet (Pasta of Janet- my mother), became a staple in our home because of its general healthy ingredient contents and for its ease and simplicity.

This quick and flavorful pasta combines hot (Chicken) Italian Sausage, sweet and juicy cherry tomatoes, green and earthy broccoli/broccolini, fresh herbs, and of course, parmesan cheese. I fell in love with this pasta and often requested it for the dinner table. I now make it quite often when I am looking for a go-to meal. Already a decently healthy meal, I have made my own tweaks to my mother’s classic pasta (like switching from regular Italian sausage to chicken Italian sausage) to create a dish that is equally as nourishing as it is indulgent. Serve with a nice green salad and red wine and you are in for an Italian delight!

Pasta di Janet

  • Servings: 4-6
  • Difficulty: easy
  • Print

Ingredients:

  • 1 pound farfalle pasta
  • 1 pound hot Chicken Italian sausage, removed from casings
  • 2 small heads broccoli or 1 large package Italian broccolini
  • 2 pints cherry or grape tomatoes, halved
  • 2 tablespoons minced garlic
  • 1 pinch red pepper flakes
  • ¼ cup grated parmesan cheese
  • ¼ fresh Italian flat leaf parsley, chopped
  • 2 tablespoons fresh basil, julienned
  • 2 tablespoons extra virgin olive oil
  • Salt & Pepper

Directions:

Bring large pot of salted water to a boil. Heat a large pan or skillet or medium-high heat for 2 minutes. Add the sausage and break into small chunks with the back of a wooden spoon. Once the sausage is broken up, add the pasta to the water and allow to cook for 8-10 minutes until al dente.

Cook sausage until browned, about 5 minutes. Reduce heat to medium and add the tomatoes and garlic to the sausage. Cook 2-3 minutes until tomatoes soften. Meanwhile, add the broccoli or broccolini to the pasta water. Boil 2 minutes. Using a straining spoon, transfer the broccoli to the pan with the sausage and tomatoes. Stir to combine and season the mix with a pinch of salt and pepper each and red pepper flakes. Reduce heat to low and allow to continue cooking until pasta is done.

Drain the pasta, add to the pan on top of the veggies and sausage. Add the cheese and half the parsley. Toss till pasta is coated and all is well mixed. Serve into pasta bowls. Top with additional parmesan cheese and herbs and serve.

Lemon Herb Quinoa with Greens

Quinoa has really made it big these days; and I am ALL about it! Quinoa is often described as a grain, but it is technically the seed of a grain. As a seed, it packs a ton of protein, making this a great choice for a carb/starch side in place of the usual rice, pasta, and potatoes. I am often asked how to prepare quinoa; and I always tell people that it is kind of absurdly easy.

Here is the basic formula for cooking quinoa:

  • 1 part quinoa to 2 parts water
  • Bring to a boil over high heat in a small sauce pan, then reduce heat to low and cover
  • Cook for 15-20 minutes
  • Fluff with a fork and Done!

Now, that you know how to cook quinoa through, you can basically do ANYTHING with it. Still, you might want a starter recipe; this Lemon Herb Quinoa with Greens recipe is for you! It makes the perfect side to almost anything. Hope you enjoy!

Lemon Herb Quinoa with Greens

  • Servings: 4-6
  • Difficulty: absurdly easy
  • Print

Ingredients:

  • 1 cup quinoa
  • 2 cups water
  • ¼ teaspoon salt
  • ½ teaspoon black pepper
  • 1 tablespoon lemon zest
  • ¼ cup lemon juice
  • 1 tablespoon crushed garlic
  • 1 tablespoon olive oil
  • 2 tablespoons fresh basil, julienned
  • 1 tablespoon fresh flat leaf parsley, chopped
  • 1 cup spinach, kale, or power greens mix, roughly chopped.

Directions:

Place the quinoa, water, and salt in a small pot. Bring to a boil over high heat. Cover, reduce heat to low, and cook until the quinoa has absorbed the water and the quinoa has puffed, 15-20 minutes. Fluff with fork.

While the quinoa cooks, mix the lemon zest, juice, olive oil, pepper, and crushed garlic in a small bowl.

Once you’ve fluffed the quinoa, add the basil, parsley, and chopped greens. Mix until the greens are wilted. Add the lemon and oil mixture into the bowl and toss. Season with additional pepper and serve.

Tell me, how do you make your quinoa?

Balsamic Glazed Salmon

I love salmon, it really is one of the greatest fishes; it’s incredibly healthy, it’s decently affordable, and it’s freaking delicious. One thing I love about salmon is that it can be ABSURDLY EASY to make. Take my Balsamic Glazed Salmon. Minimal prep, no active cooking, and only a few minutes until it is s ready for you to plate and eat. I am always getting questions about how to make salmon; this is the best way to start! Hope you enjoy!

Balsamic Glazed Salmon

  • Servings: 4
  • Difficulty: ridiculously easy
  • Print

Ingredients:

  • 1 ½ pounds boneless, skinless salmon slab
  • 1 teaspoon salt
  • 1 teaspoon pepper
  • 1 tablespoon crushed garlic
  • 1 teaspoon Herbs de Provence
  • 1 tablespoon olive oil
  • 3 tablespoons Trader Joe’s Balsamic Glaze or similar product

Directions:

Preheat the oven to 400 ̊F.

Spray or oil a 9×13 inch baking dish. Place the salmon in the baking dish. Sprinkle with salt, pepper, and Herbs de Provence. Spread the crushed garlic all over the salmon. Drizzle with olive oil. Drizzle the balsamic glaze all over, and with a pastry brush, spread the glaze until even and the salmon is covered.

Bake for 12-15 minutes depending on the thickness of the salmon. Cut into fillets and serve.